Introduction
ZRobo is the Android app for REDZ optical probes. It reads electricity meters that speak IEC 62056-21 mode C through the probe's optical head, shows every line as it arrives and checks the reading's block check character.
A correct reading can be saved as a plain text file, which you can open, share or delete later.
With a probe connected over Bluetooth, ZRobo also works on the probe itself: it reads and writes the probe's settings, runs its diagnostics, updates its firmware and reads its Bluetooth module.
What you need
- An Android phone or tablet with Android 9 or newer.
- A REDZ Bluetooth optical probe, such as the KMK118 or the KMK119, or a REDZ wired optical probe with a USB OTG cable.
- For the probe's settings, diagnostics, firmware and module: a Bluetooth probe. Over USB, ZRobo reads the meter only.
Languages
ZRobo follows the phone's language: English, Turkish or Italian. On a phone set to any other language it is in English. This manual shows the English screens.
Installing and permissions
Install ZRobo from Google Play, where it is listed as ZRobo - Meter Reader.
If an older ZRobo is on the phone, the new one installs over it as an update and the readings you saved with it stay where they are.
Bluetooth permission
ZRobo asks for Bluetooth permission the first time it needs it. Without it no probe can be listed, and the Devices page says "Bluetooth permission was not granted - devices cannot be listed without it. Tap Scan to be asked again."
On Android 9, 10 and 11, Android lets an app scan for Bluetooth devices only with location permission, and only while the phone's location setting is on. ZRobo does not use or send your location. If the location setting is off, a scan finds nothing and ZRobo says "Location services are off - Android returns an empty scan on this version. Turn location on and search again."
File access on Android 9 and 10
On Android 9 and 10, the first time ZRobo opens or saves a reading file, Android asks for access to files and ZRobo says "ZRobo needs file access permission to operate properly". That time the list is not opened and the reading is not saved. After you allow access, open the list again; correct readings are saved from then on.
USB permission
When a supported wired probe is plugged in, Android offers to open ZRobo for it. If access to the probe is refused, ZRobo says "USB permission was not granted - the probe cannot be opened."
Connecting to a probe
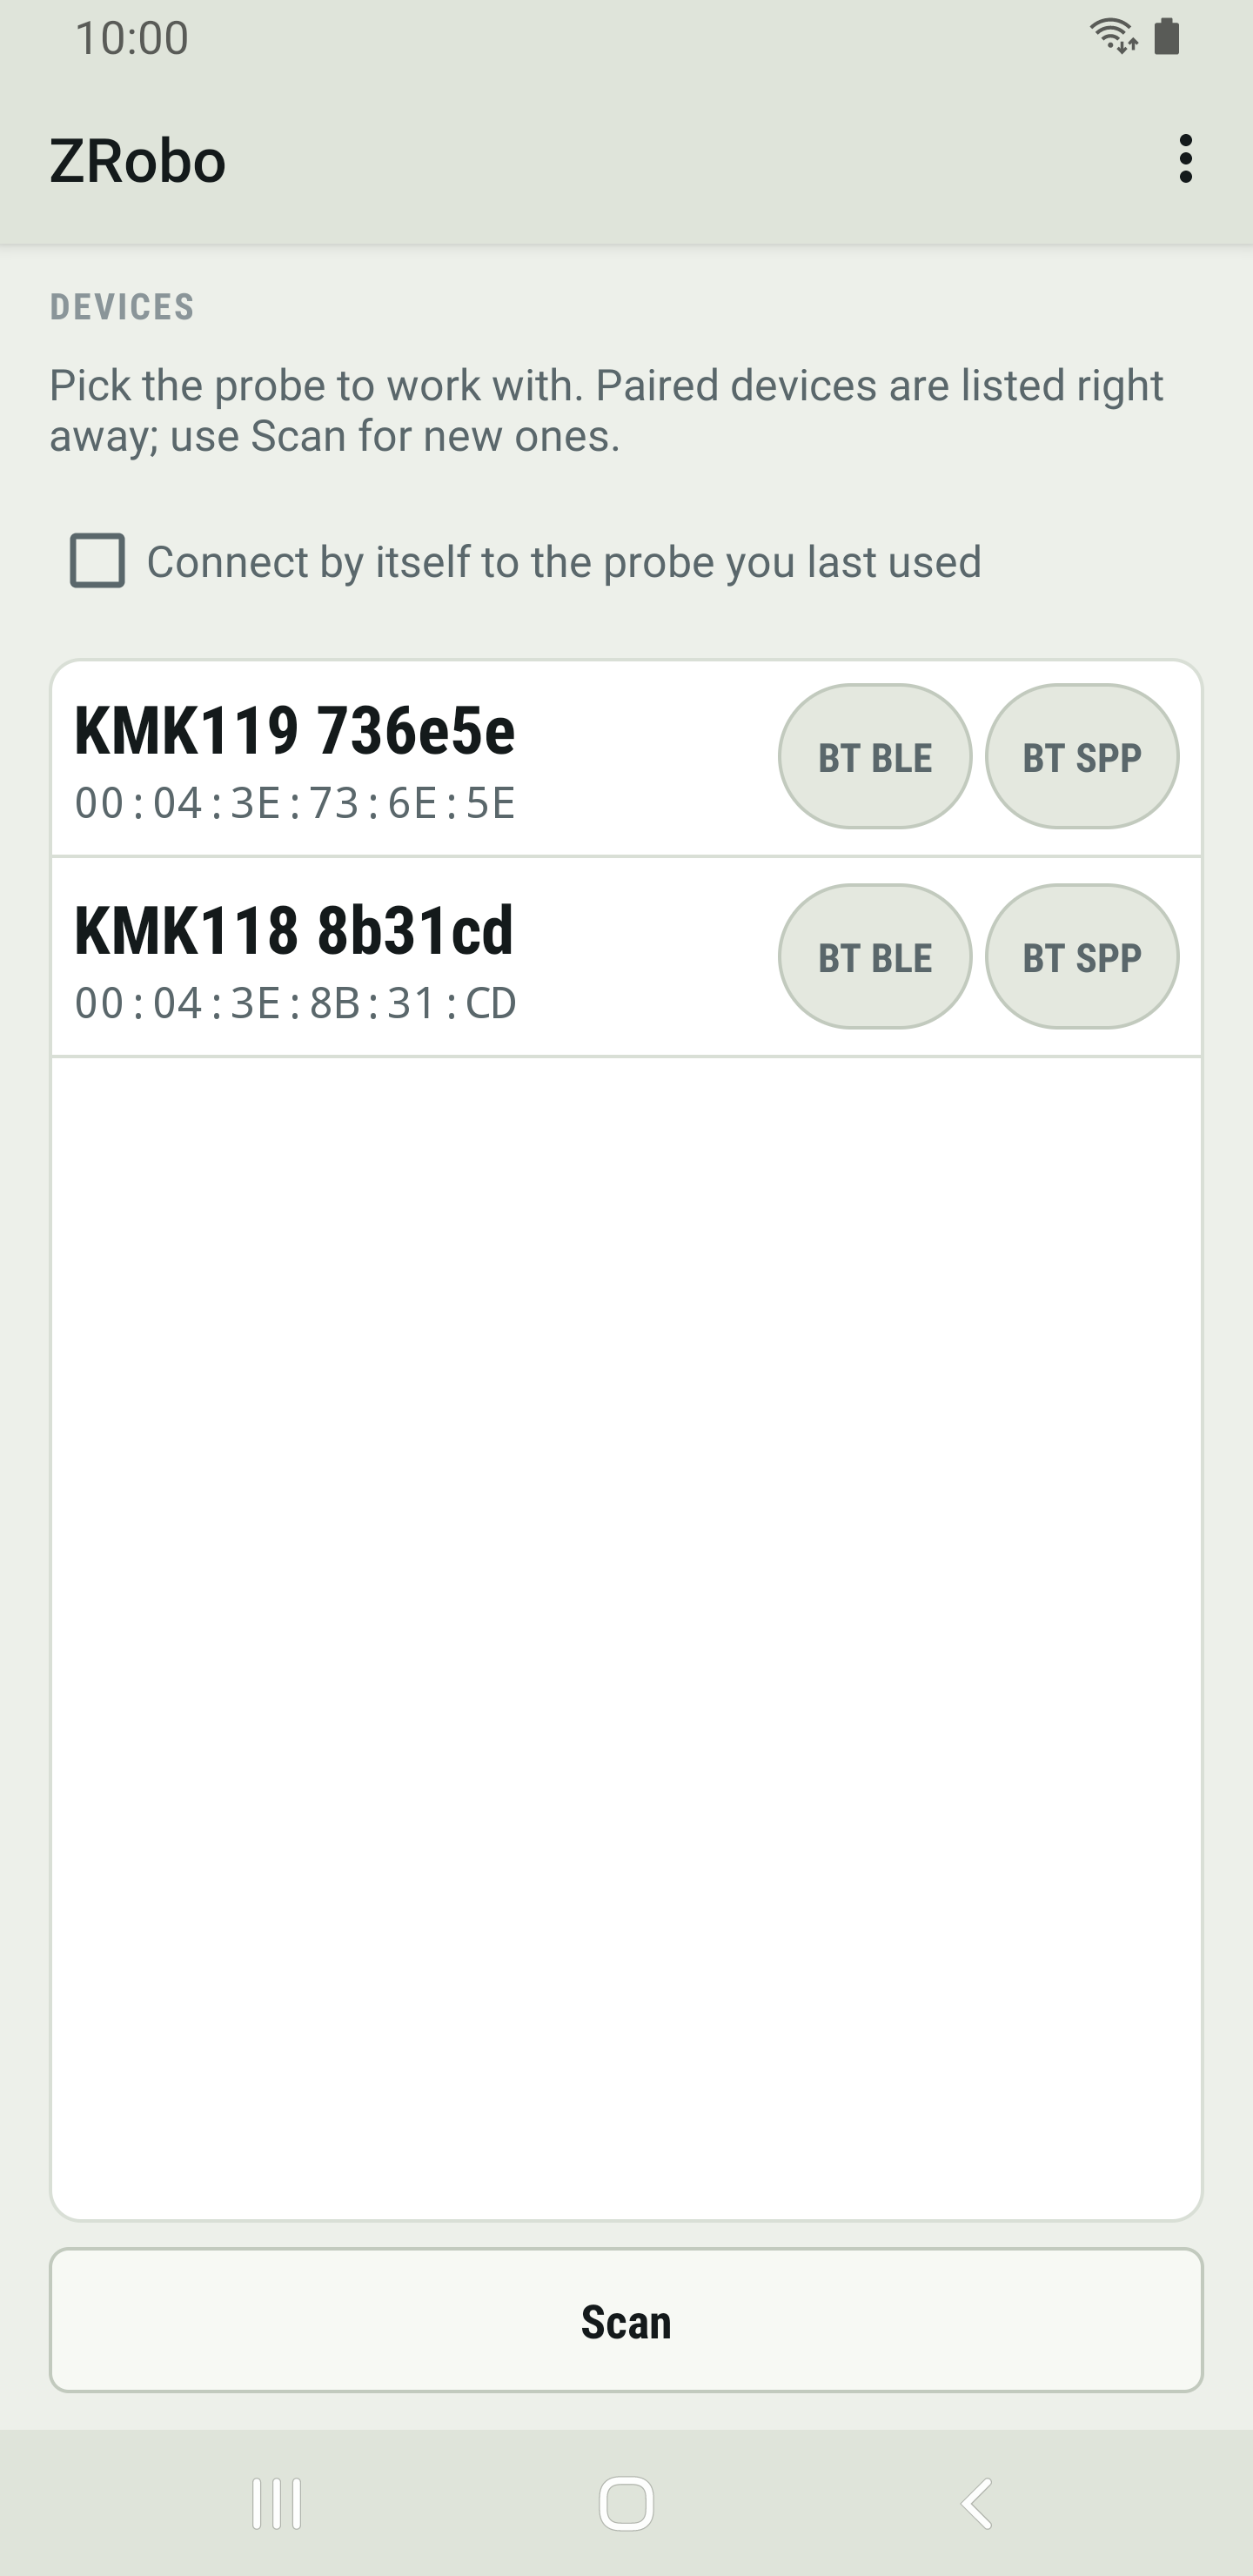
Until a probe is connected, ZRobo shows only the Devices page. The other pages appear at the bottom of the screen once a probe is connected.
Bluetooth probes
- Switch the probe on.
- Probes the phone is already paired with are listed straight away. To find a new one, tap Scan. The scan runs for 15 seconds.
- Each probe has a BT SPP button. A probe that has offered Bluetooth Low Energy in a scan also has a BT BLE button, and ZRobo remembers it. Tap the one you want to connect over.
- If the phone has not been paired with the probe, Android shows a pairing request. Confirm it straight away: if it is left open, Android closes it and nothing is paired.
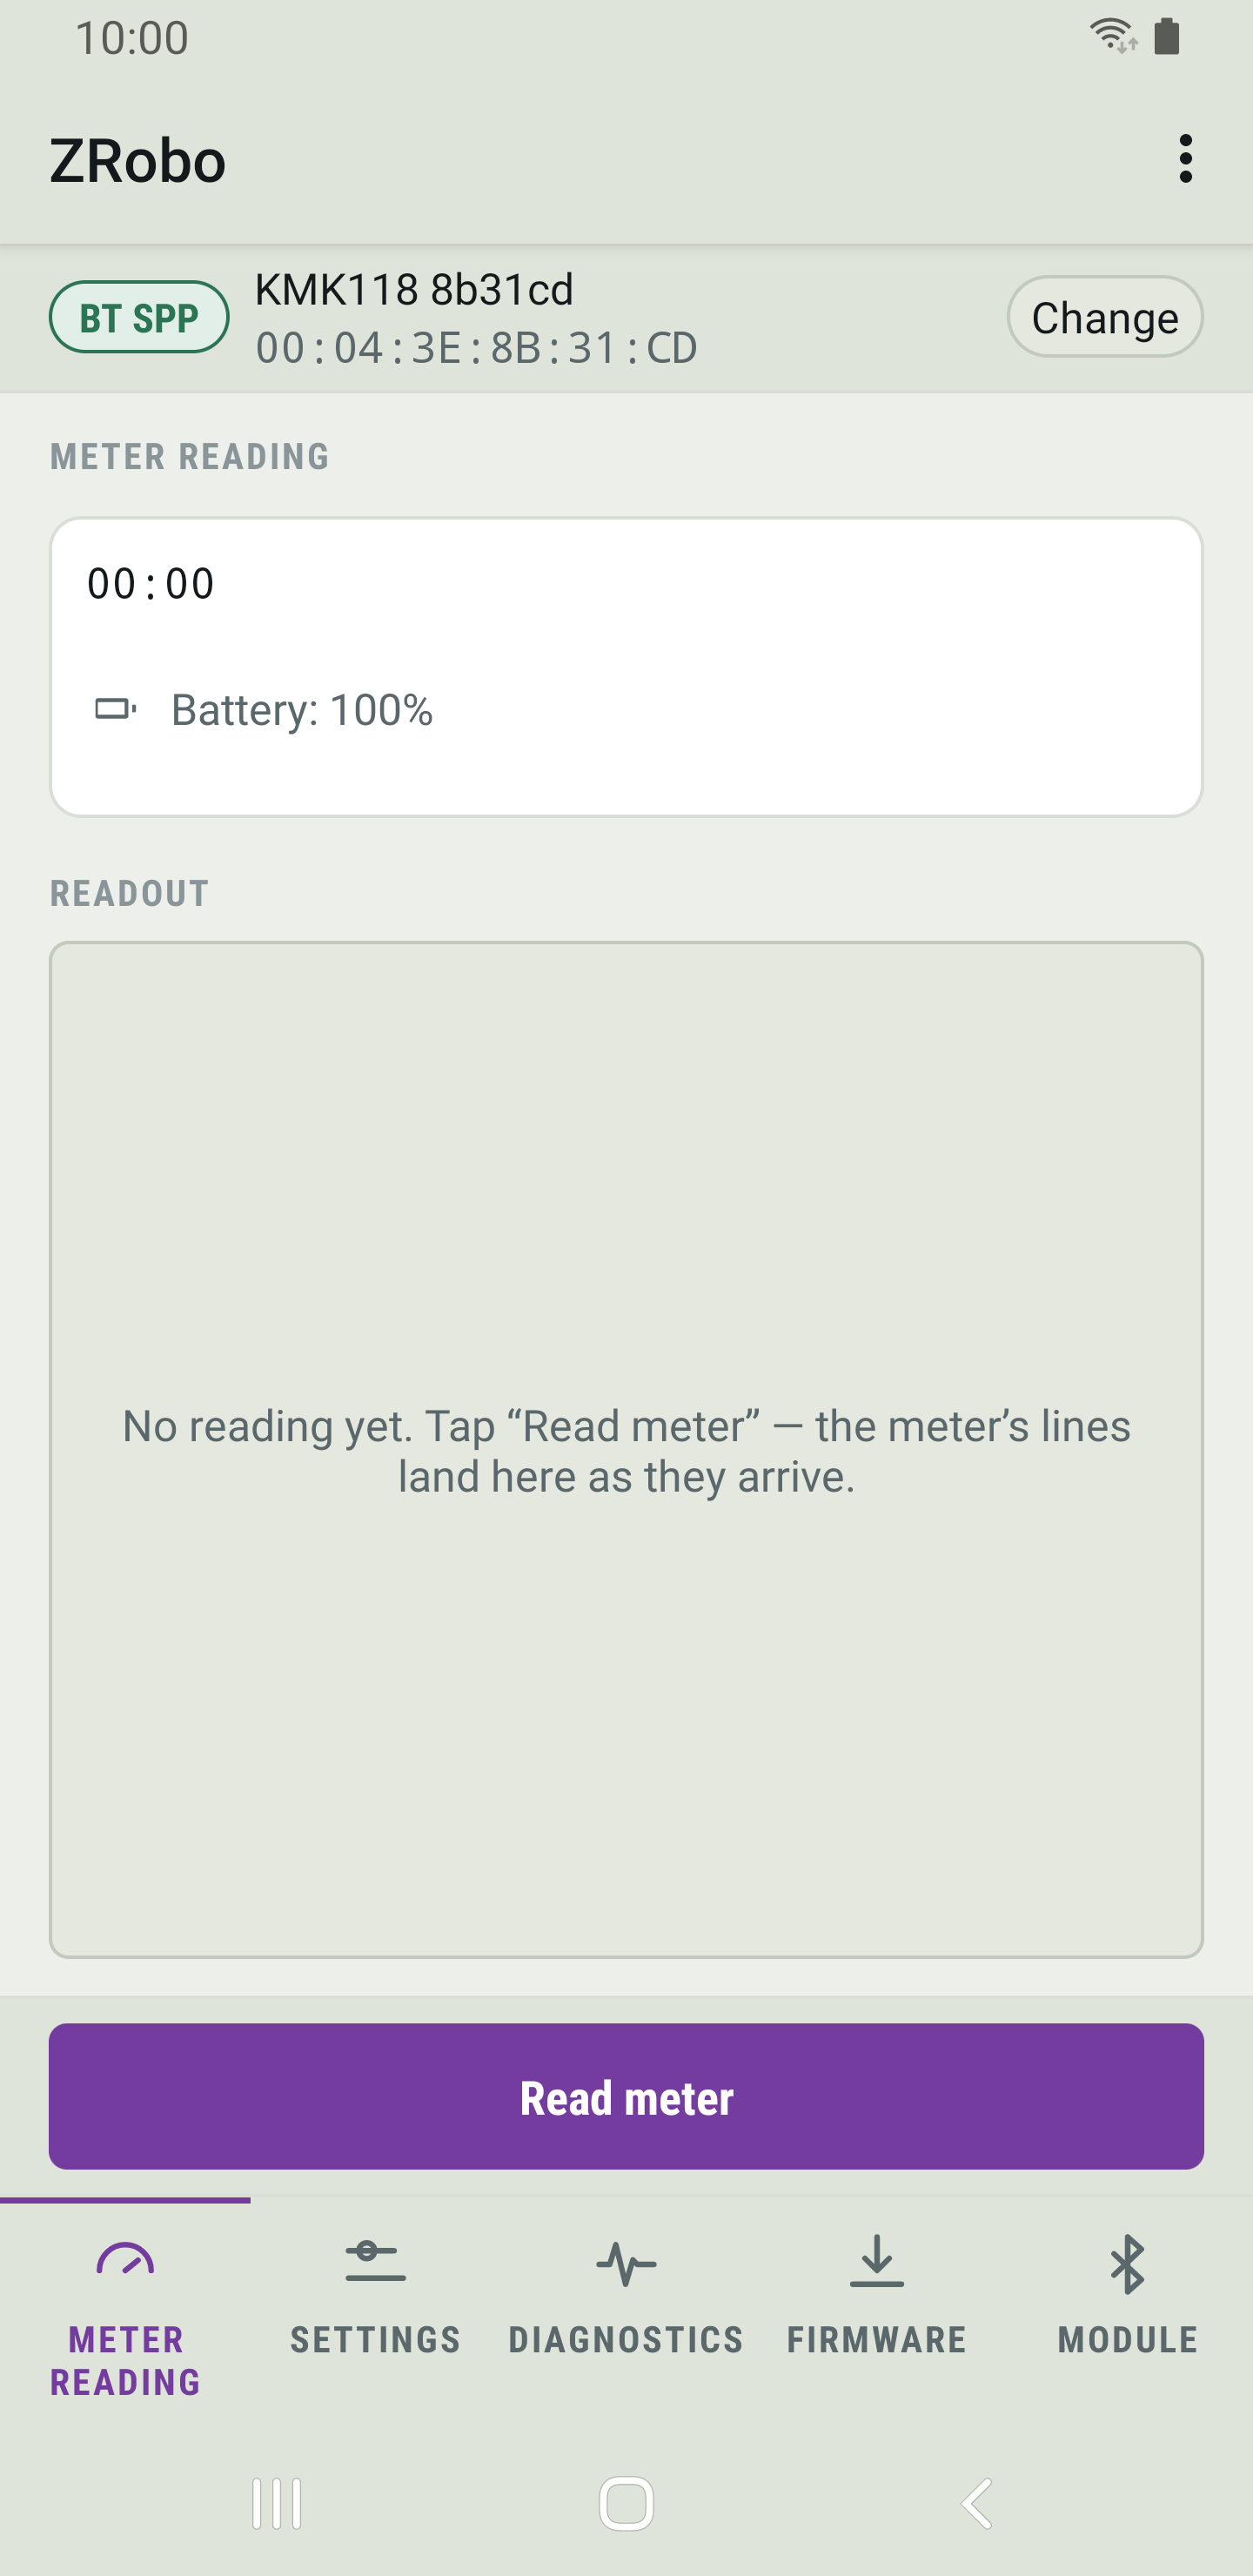
- When the link is up, the bar at the top shows the link and the probe's name, and ZRobo opens Meter reading.
A scan lists only REDZ probes: devices whose name contains REDZ or KMK, and probes whose Bluetooth module has gone back to its factory name. To list every Bluetooth device, tick Show all Bluetooth devices when scanning (default: REDZ/KMK probes only) in Settings.
SPP or BLE
Both links read meters, change settings and update firmware. Reading the Bluetooth module is fully supported over BT SPP only; over BT BLE ZRobo tells you when it needs BT SPP.
Wired probes
Plug the probe in with a USB OTG cable. The bar shows USB and ZRobo opens Meter reading. If ZRobo cannot tell which kind of USB chip the cable has, it asks "Select probe type".
The bar
- When the link drops, the bar keeps the probe's name and shows Offline. Tap the bar to connect again.
- Tap Change to go to the Devices page and pick another probe.
- If a reading or another job is still running, ZRobo asks before it changes the probe, because changing it stops the job.
Connecting by itself
With Connect by itself to the probe you last used ticked, ZRobo connects to the probe you used last when it starts. It marks that probe on the Devices page and waits 3 seconds first, so you can pick another one.
Reading a meter
Put the probe's optical head on the meter's optical port and make sure the probe is set for this meter (see the probe's manual). Then tap Read meter on the Meter reading page.
This video is in the online version of this manual.
The meter's lines appear under Readout as they arrive. When the reading ends, the label next to Readout shows OK if the reading arrived whole and its block check character is right, or Failed if not.
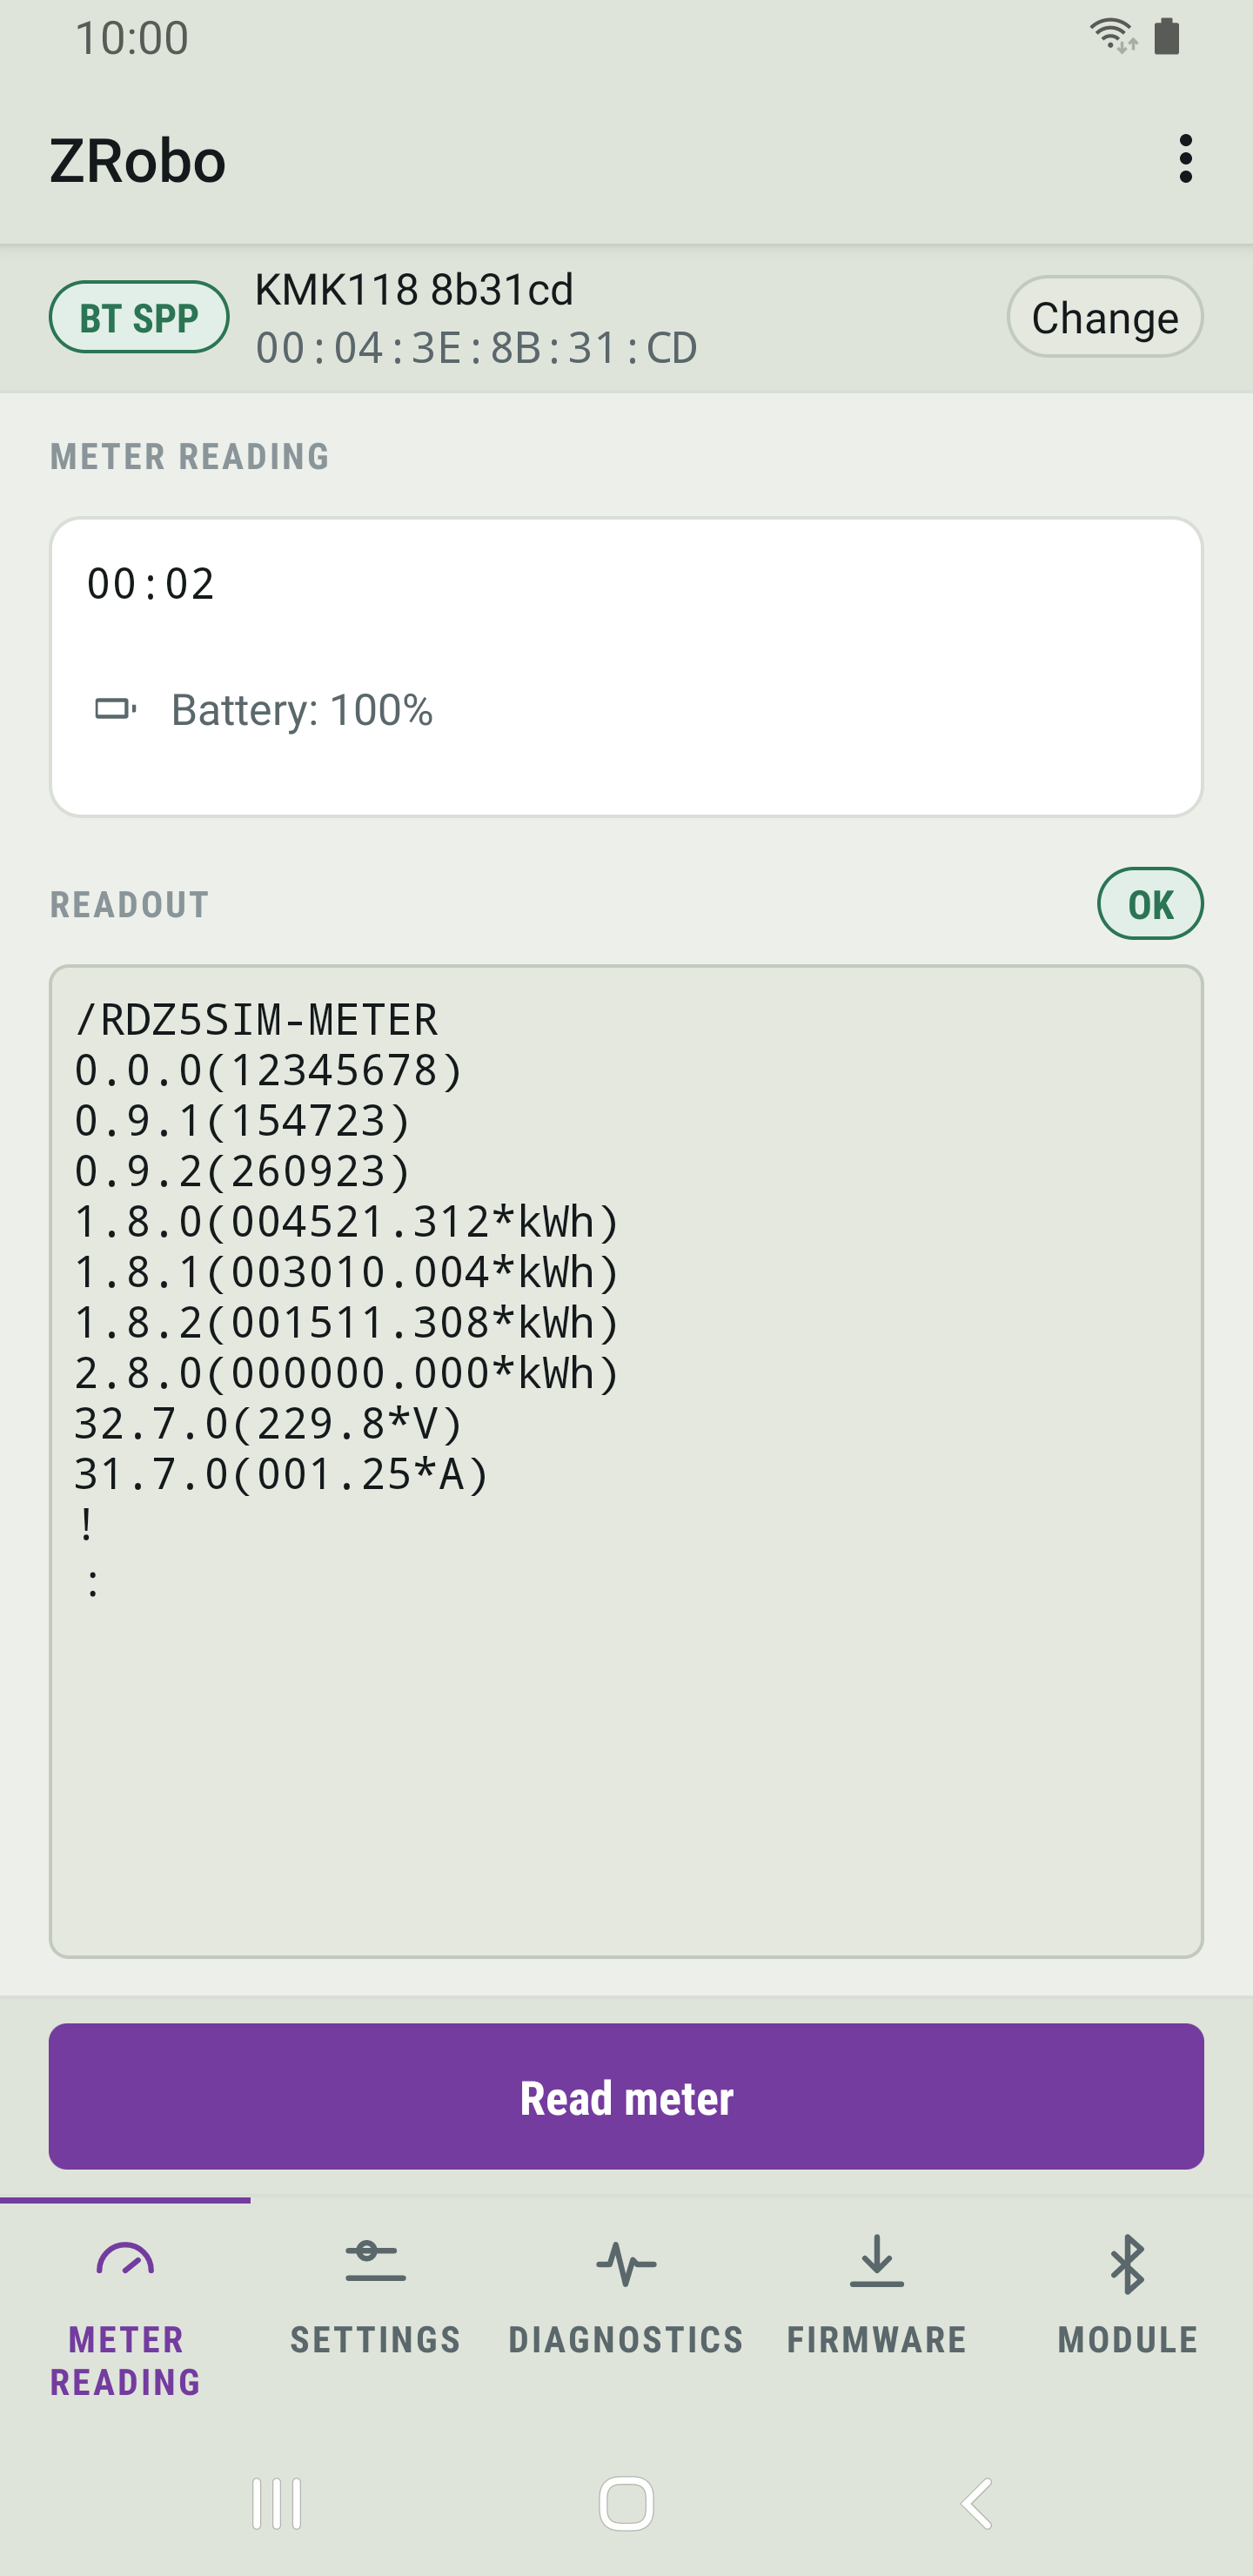
Above the readout, a clock shows how long the reading took and, for a Bluetooth probe, the probe's battery level. Tap the battery line to ask the probe again.
When nothing arrives
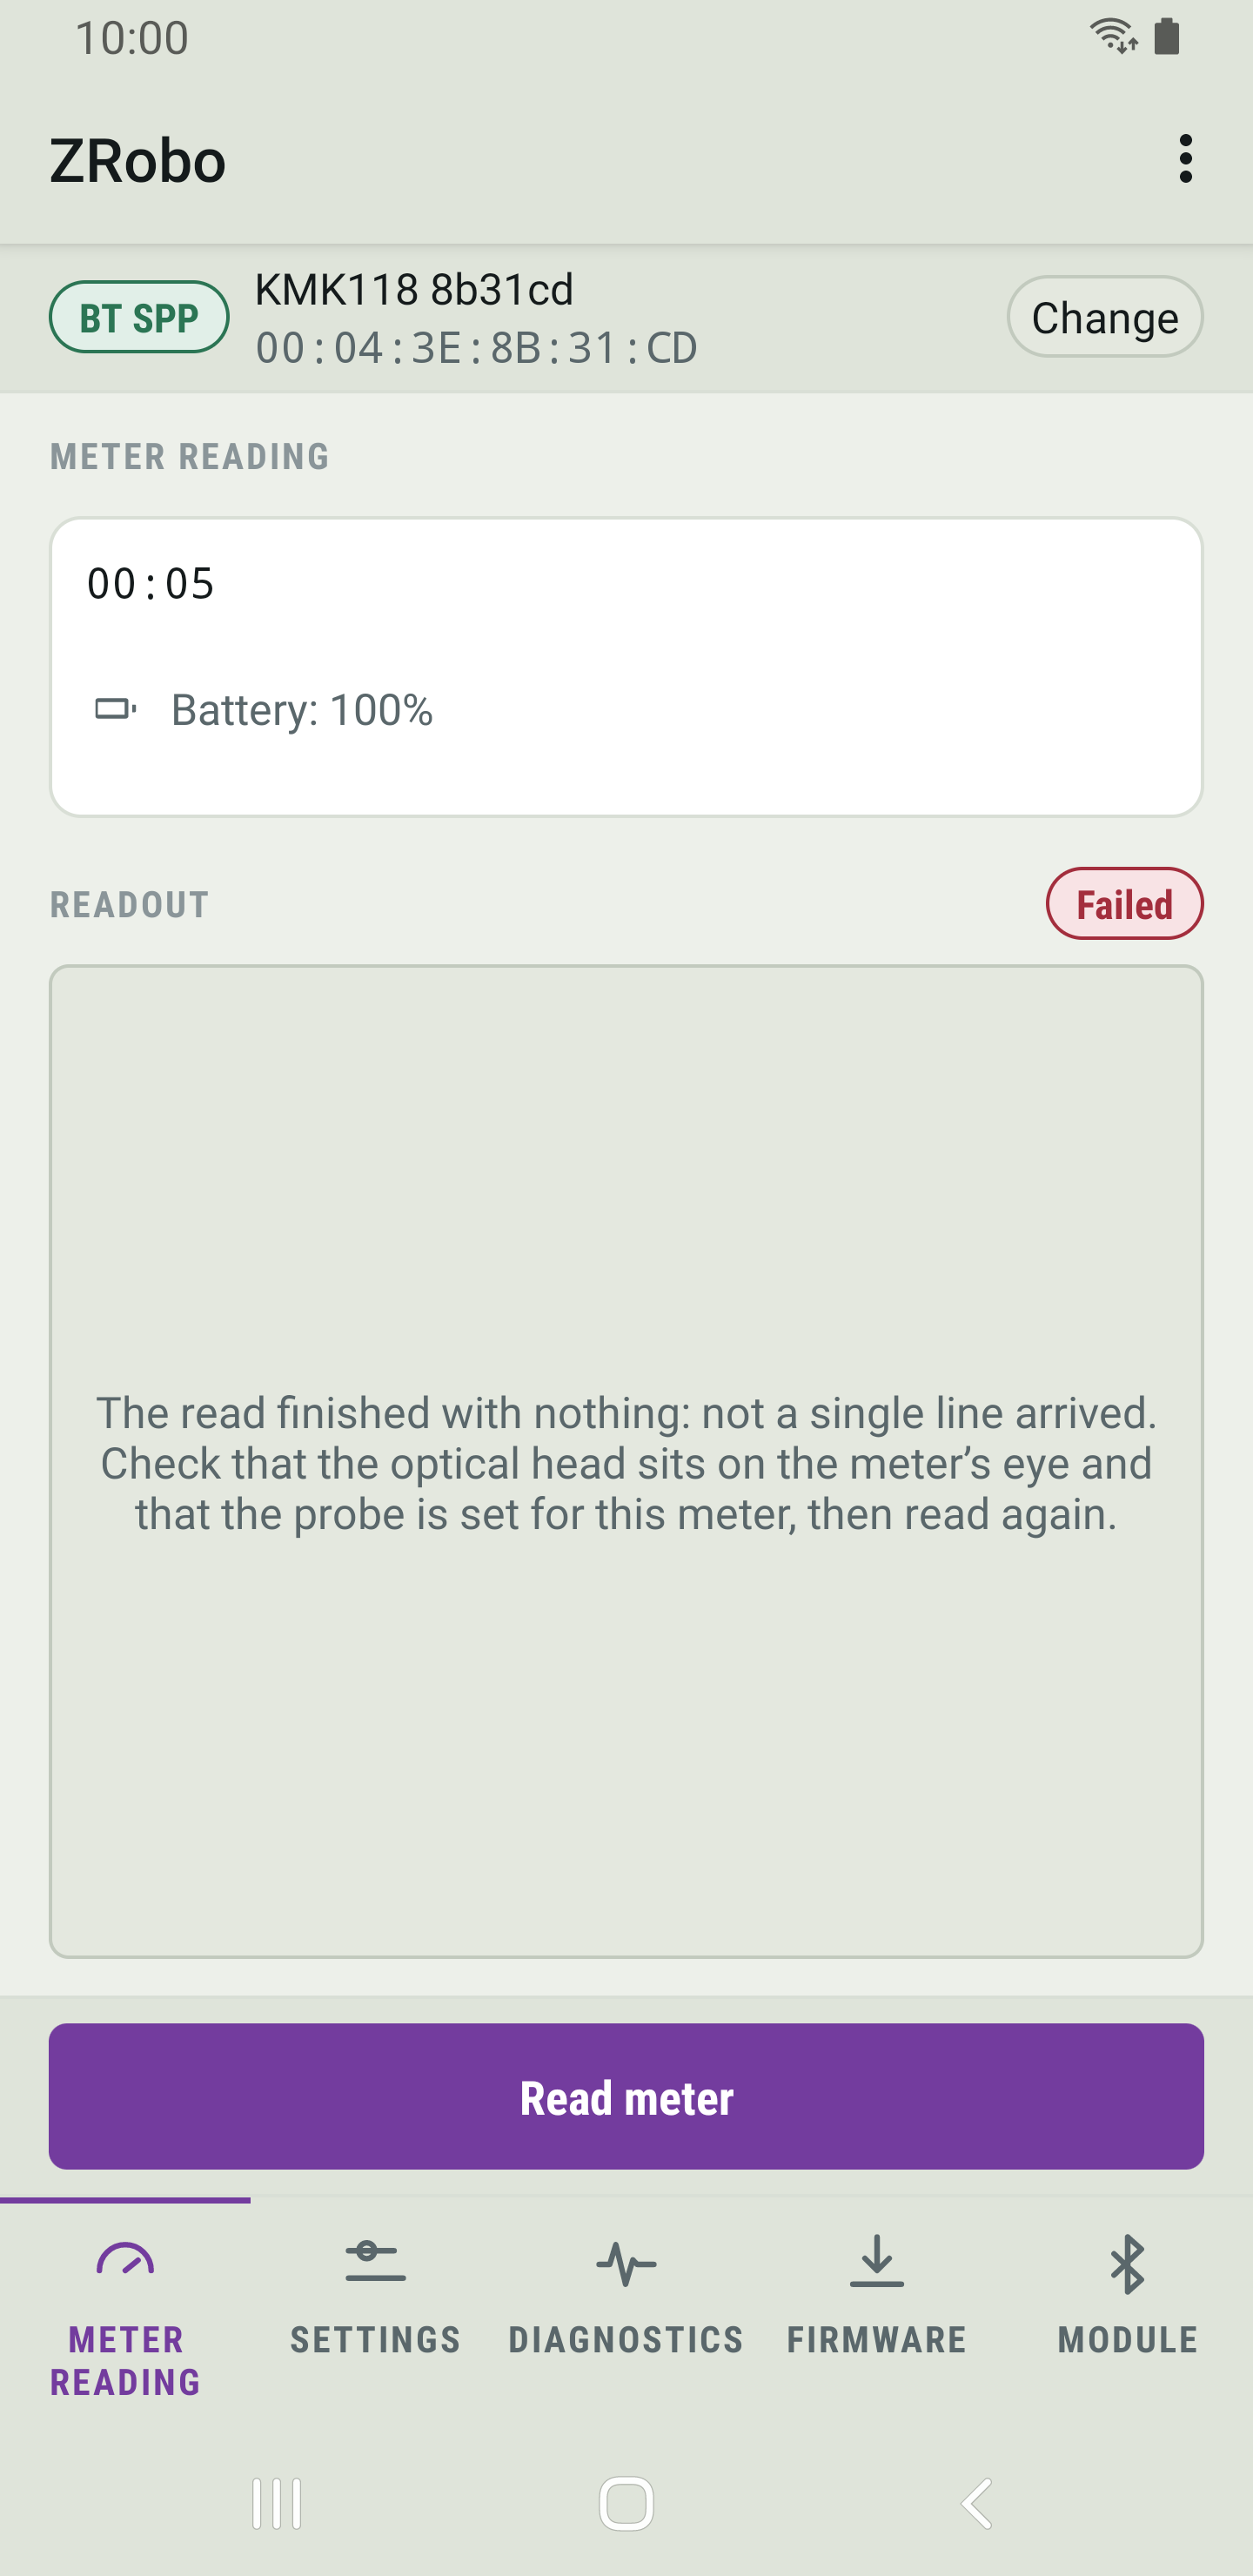
If not a single line arrives, ZRobo says "The read finished with nothing: not a single line arrived. Check that the optical head sits on the meter's eye and that the probe is set for this meter, then read again." The most common reasons are an optical head that is not on the meter's port and a probe in a mode that does not suit the meter.
Bluetooth REDZ command mode
Bluetooth REDZ command mode in Settings tells ZRobo to set the probe's line to 300 baud 7E1 before every reading. Turn it on for a probe in command mode. For a probe that sets the line itself (an automatic mode), turn it off: otherwise the probe refuses the command and ZRobo shows "The probe refused it: not in command mode right now" before each reading, although the reading still completes.
Wired probes
With a wired probe, Meter reading also shows Initial baud rate and Available ports. The initial baud rate is the speed the meter starts at; for most meters it is 300. ZRobo switches to the speed the meter offers by itself.
Saved readings
ZRobo saves a reading only when Automatically save a file after a successful reading is ticked in Settings, and only a reading whose block check character is right. It then says "The reading was saved to a file." There is no button to save a reading by hand.
The file is named after the meter's serial number, the first three letters of its identification and the date and time, for example 12345678_RDZ_2026_10_9_16_43_39.txt. It holds the reading exactly as the meter sent it.
Opening, sharing and deleting
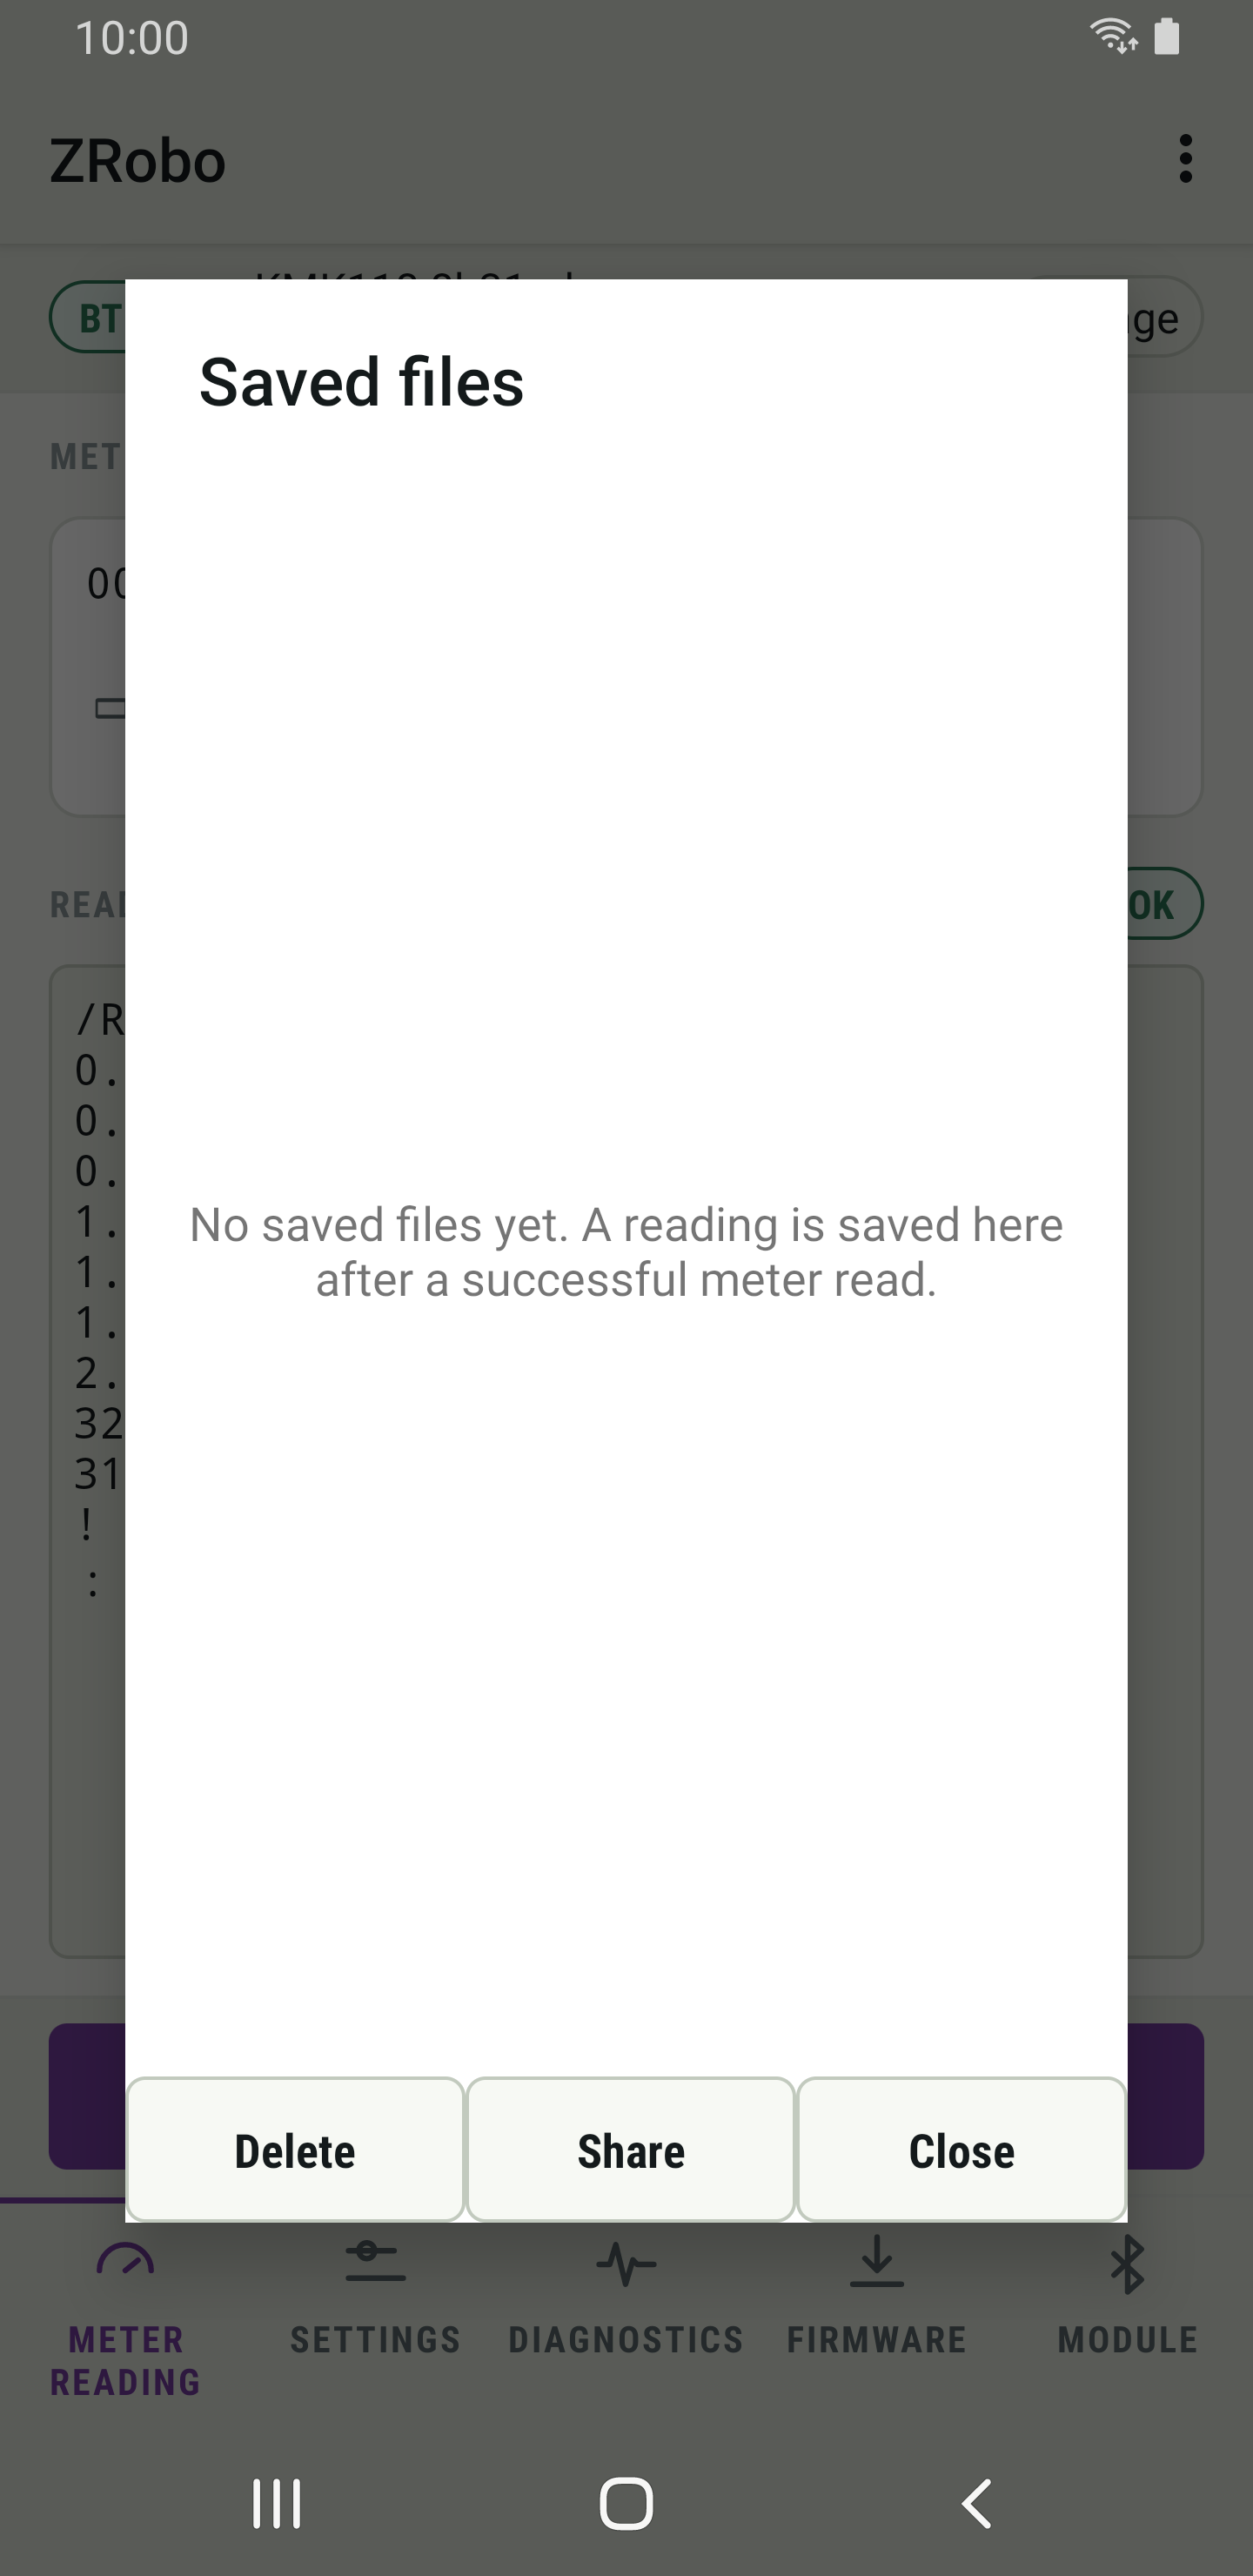
- Open Saved reading files from the menu at the top right, or tap Show saved files in Settings.
- Tap a file's name to open it with an app of your choice.
- To share or delete files, tick them and tap Share or Delete.
- Tap Close to go back.
Settings
Settings has two tabs. Functional holds the app's own options. Device works on the probe itself and is there only while a probe is connected over Bluetooth.
The Functional tab
- Connect by itself to the probe you last used: see Connecting to a probe.
- Show all Bluetooth devices when scanning (default: REDZ/KMK probes only): see Connecting to a probe.
- Bluetooth REDZ command mode: see Reading a meter.
- Automatically save a file after a successful reading: see Saved readings.
Tick or clear the boxes, then tap Save. ZRobo says "Settings updated".
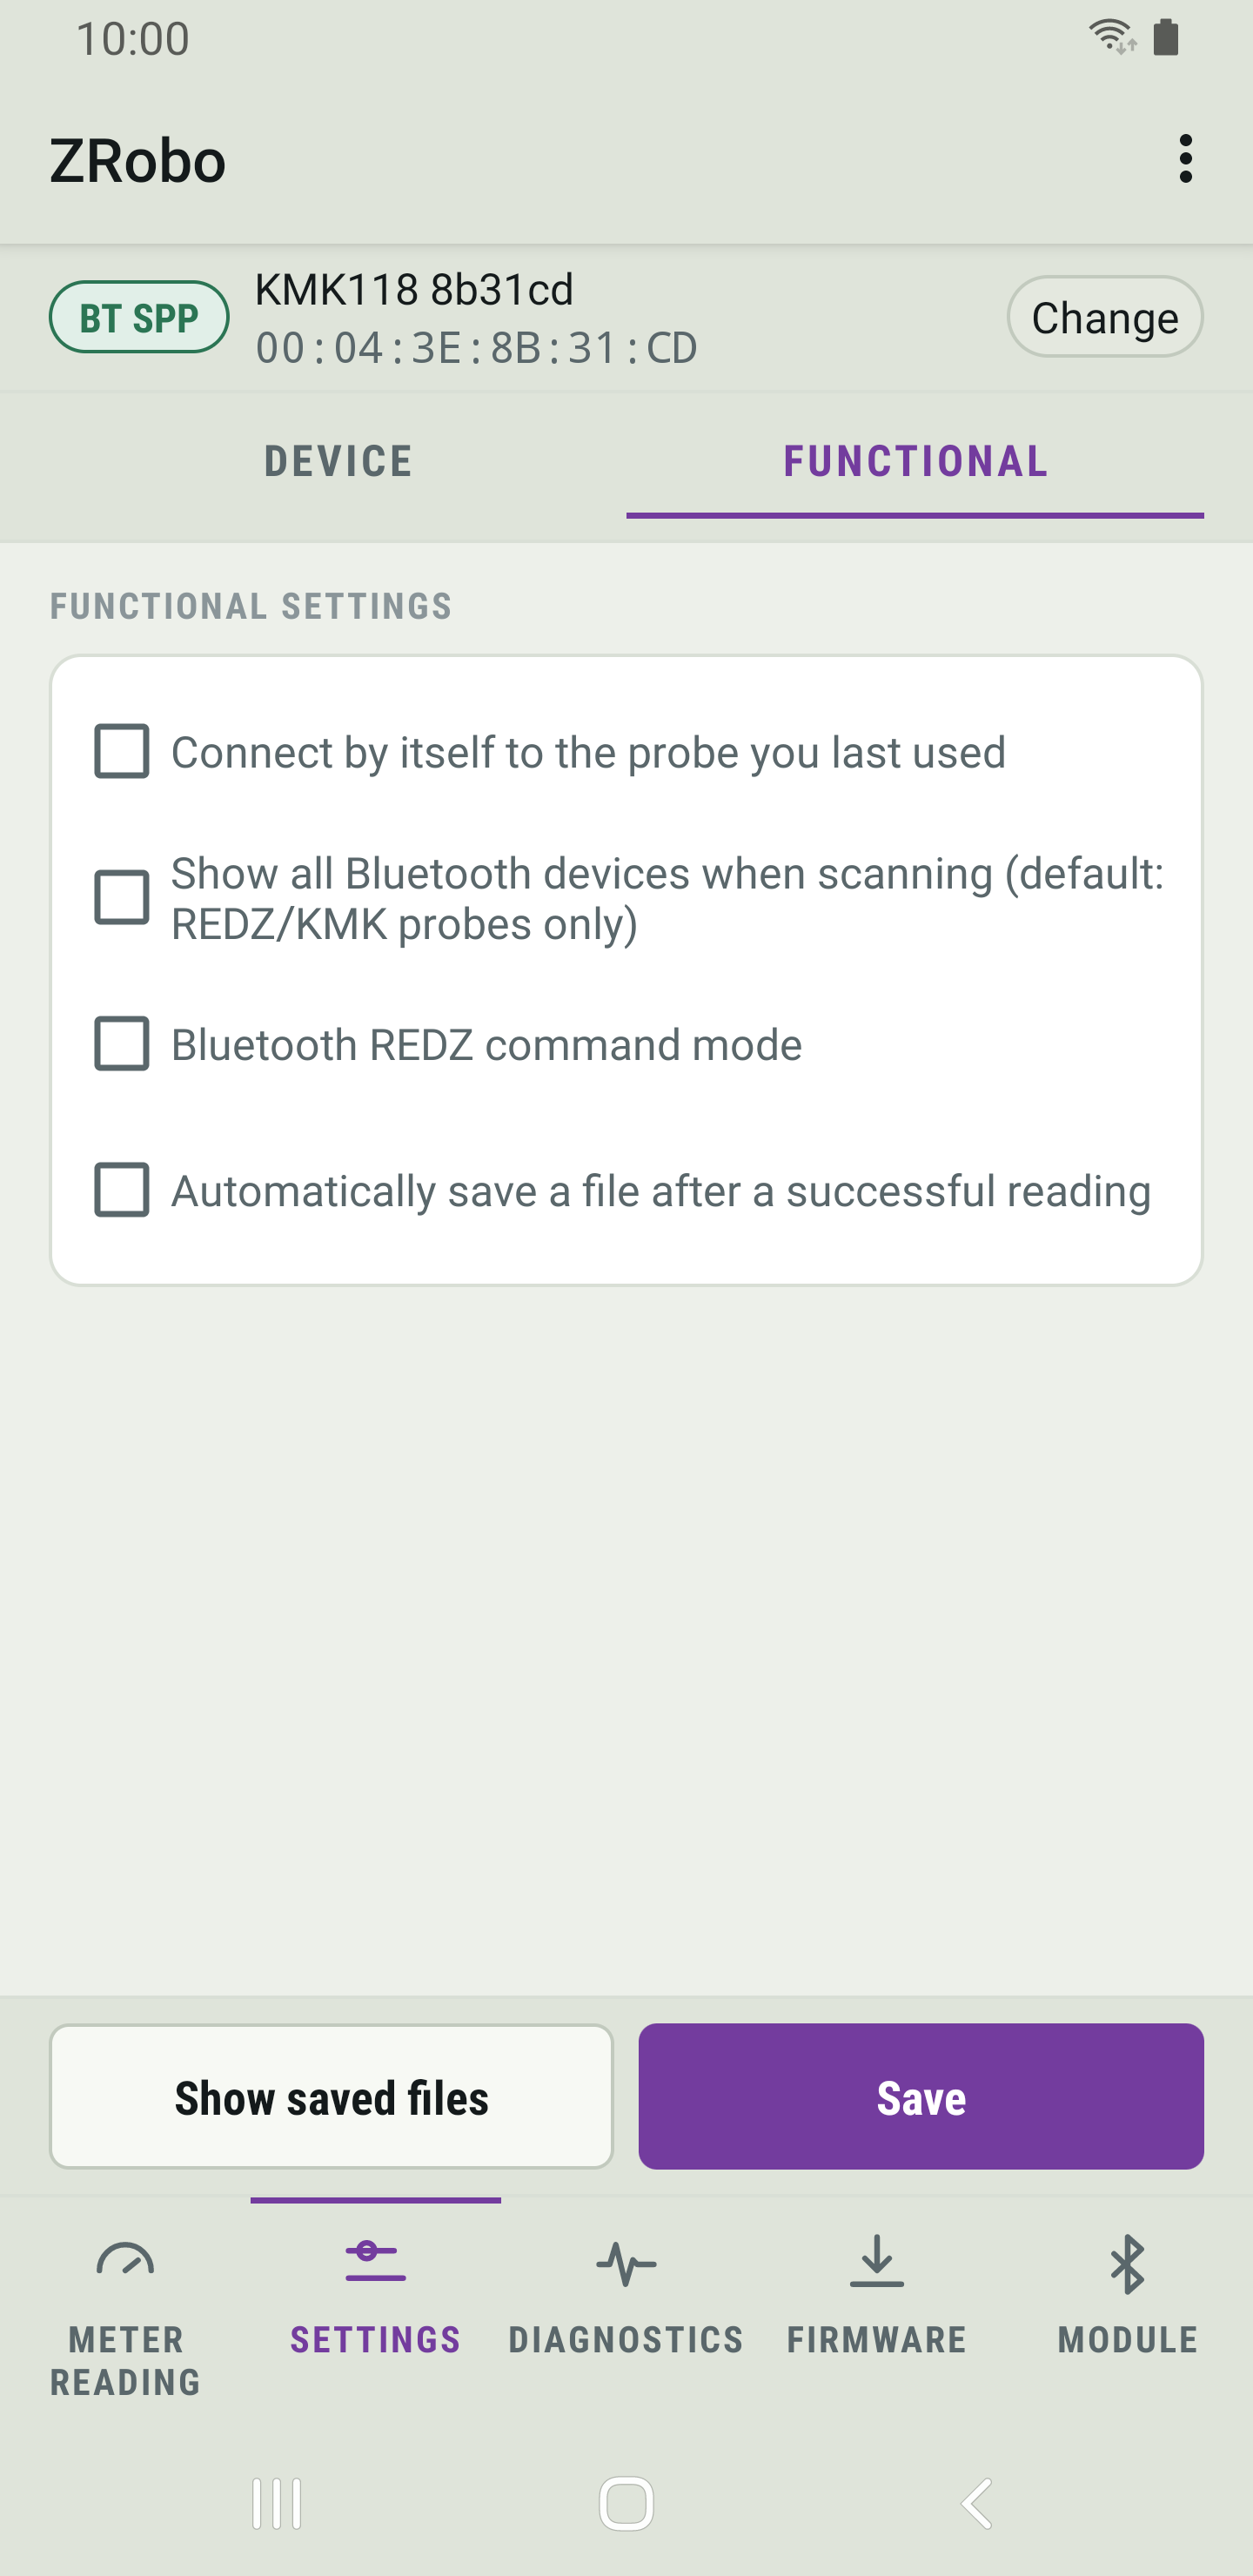
Without a probe, the same tab opens from the menu at the top right: App settings.
The Device tab
The Device tab shows nothing as the probe's value until the probe has been read. Tap Read from the device: ZRobo asks the probe and fills each row with what the probe reports, on the line under the setting's name. A dash there means the probe did not report that setting.
That line is what the probe holds. The selection box below it is the value you would write; before you change it, it can show something else.
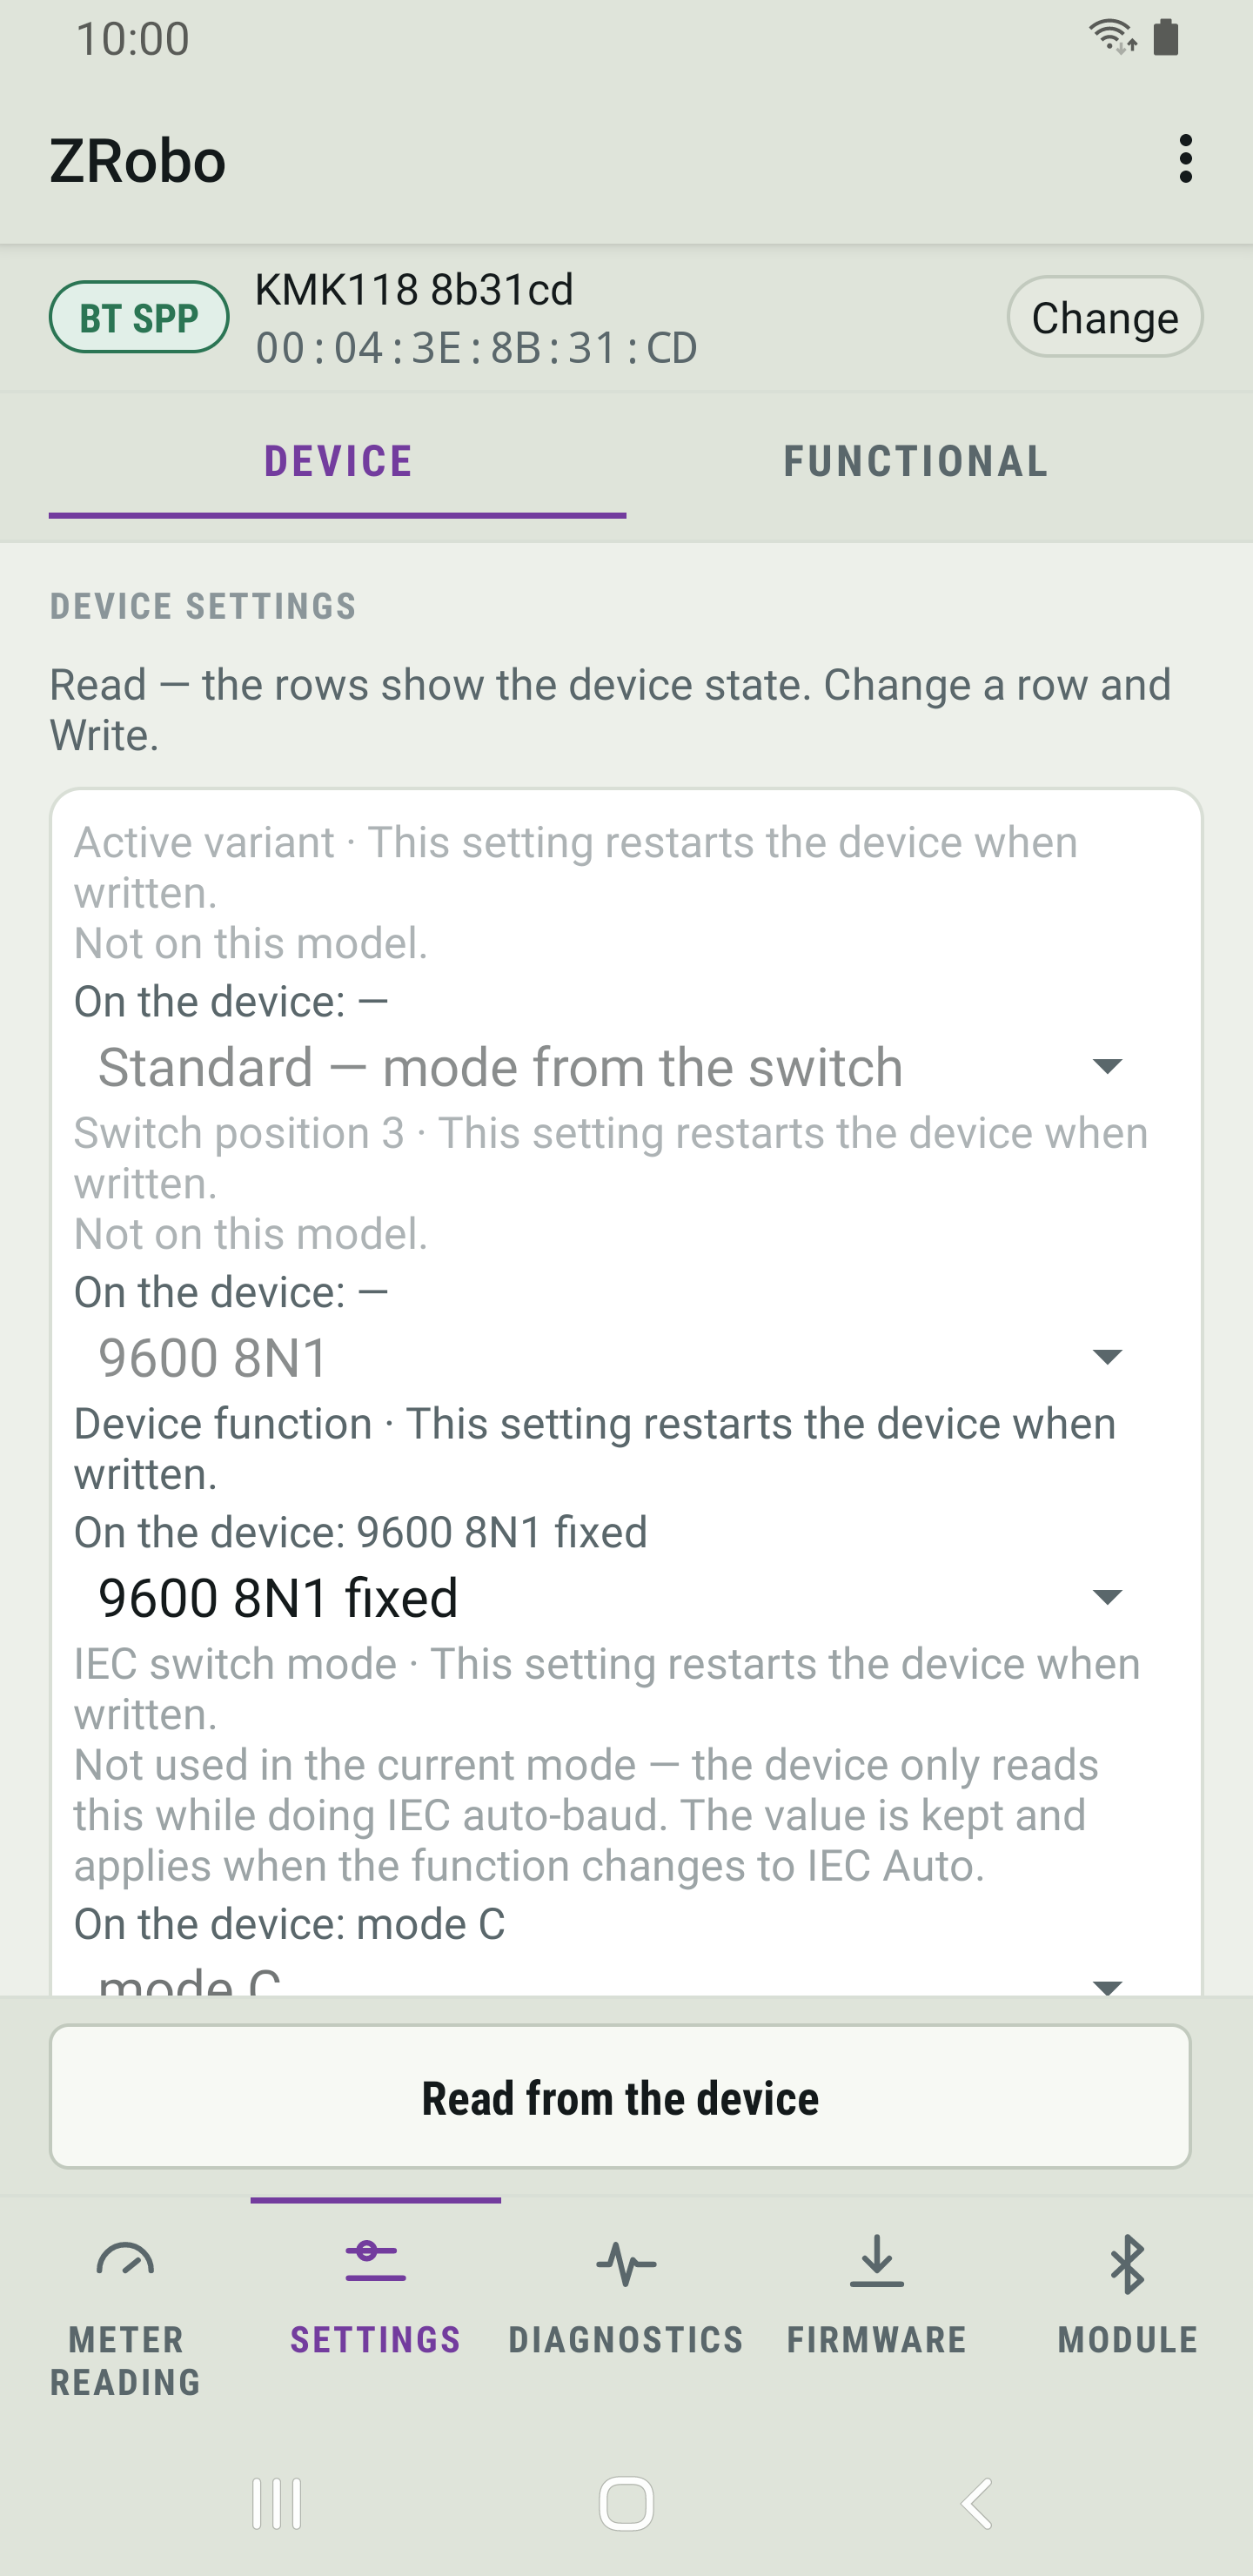
- Some settings belong to one model only. On another model the row stays, greyed, with "Not on this model."
- A row can be dimmed because the probe does not use it in its current function. Its value can still be written; the probe keeps it for when the function changes.
- Some rows add "This setting restarts the device when written." When you write such a setting, ZRobo reconnects to the probe by itself.
- Tap Read from the device.
- Change the rows you want. Write and verify appears once a row differs from what the probe holds.
- Tap Write and verify. ZRobo writes only the rows you changed, reads them back from the probe and marks each one, for example "written and verified", "accepted but could not be read back" or "the device refused it".
What each setting does on the probe is explained in the probe's manual.
Meter line
Meter line sets the speed and framing of the probe's line towards the meter. It works only while the probe is in command mode; otherwise the card says why, and its buttons stay off.
- Apply to line changes the line now, until the probe is switched off.
- Store as power-on default makes the probe's current sleep, auto power-off, sensitivity and line settings its power-on defaults.
- Hold the line in break keeps the line in break: while it is held the probe cannot read the meter, and it stays held after ZRobo closes. Tap Release the break to end it.
For a speed that is known to fail towards the meter, ZRobo shows a warning under the selection.
Device management
With Advanced mode on, the Device tab also shows Device management:
- Device factory defaults restores the probe's factory values: sleep on, 180 s auto power-off, default sensitivity and a 300 7E1 line. The model's identity settings and the Bluetooth module are not touched. The probe accepts it only in command mode. ZRobo asks before it sends it.
- Turn the device off switches the probe off, the same as its power button. The link drops; switch the probe on again by hand.
- Module guard policy sets whether the probe repairs its Bluetooth module's settings when it powers up. Changing it is not everyday work.
Diagnostics
Diagnostics asks a probe connected over Bluetooth how it is doing. Tap Run diagnostics. ZRobo asks one question after another and adds each answer as it arrives; the bar under the title shows how far it has got. It does not run while a meter is being read.
The answers come in four groups:
- Device state (0xDA): the probe's state at that moment, such as its operating mode, its line to the meter, its sensitivity and its Bluetooth module type.
- Device: firmware version, battery, why it last restarted and how long it has been on.
- Meter side (U1): counters of the probe's line to the meter.
- Module side (U2): counters of the probe's line to its Bluetooth module.
Under a value, a short note says what it means. The note is green when the value is as it should be, amber or red when it is not, and grey when it is only information.
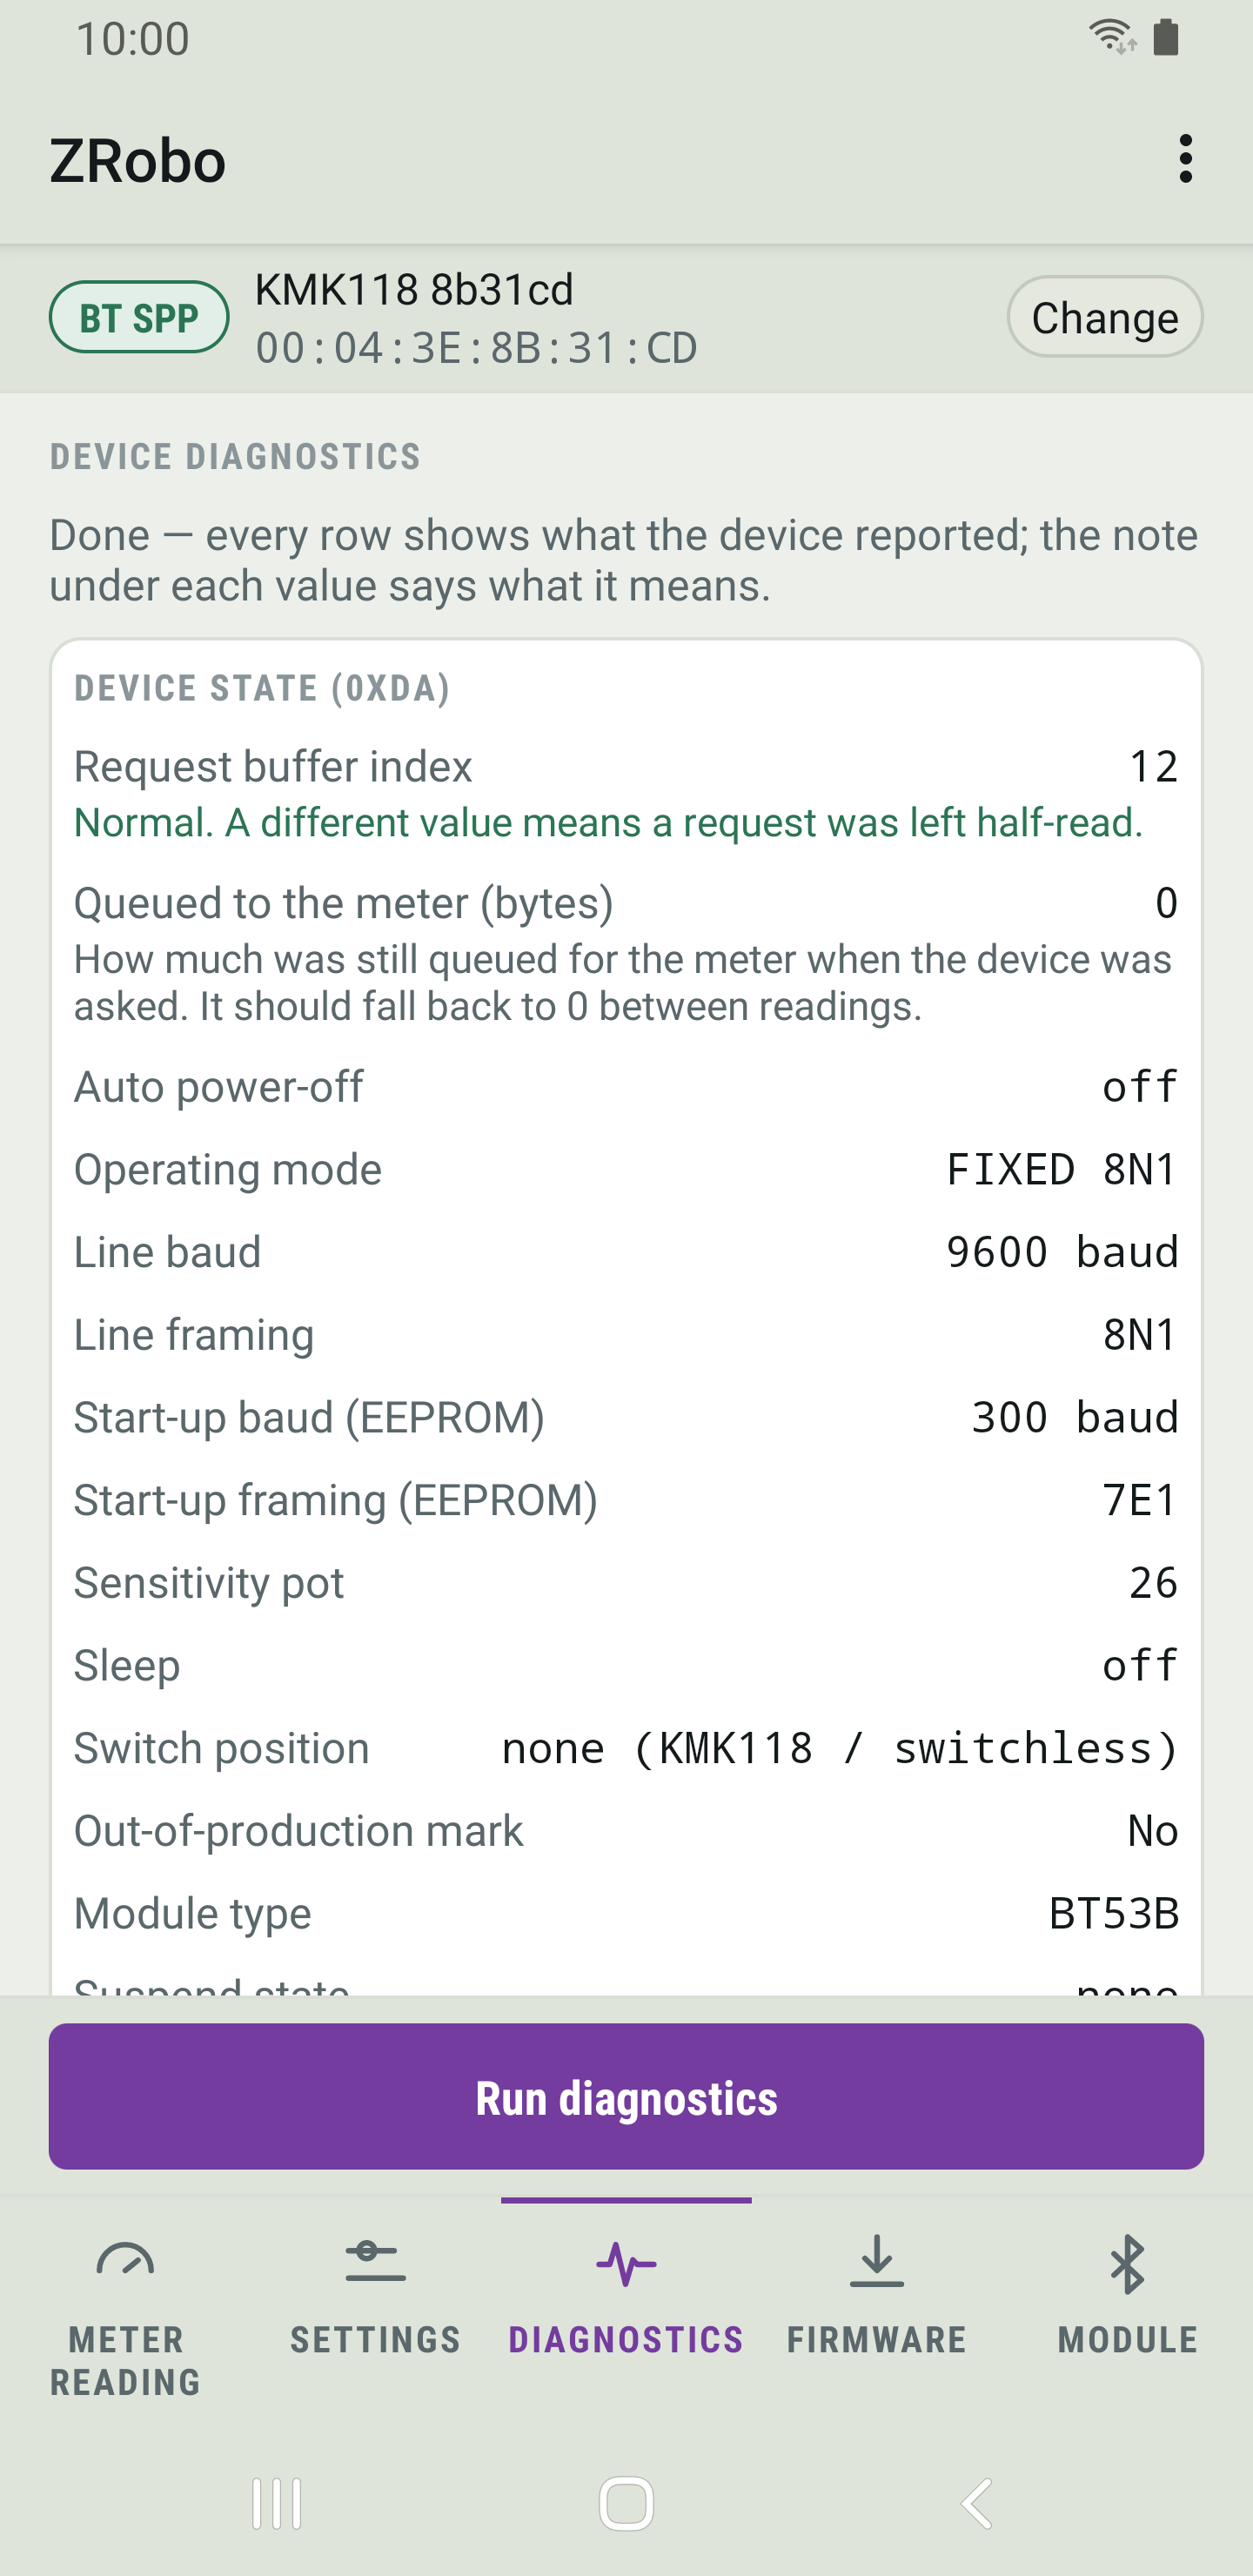
An older firmware does not have every counter. ZRobo does not ask for those, so a missing answer is not shown as a fault; the line at the top says how many were left out.
If the probe does not answer the first question, ZRobo stops there and says "Device did not answer ZT queries - old firmware or not a REDZ probe."
Firmware update
Firmware updates the firmware of a probe connected over Bluetooth. It does not start while a meter is being read or another job is running on the probe.
Choosing the firmware file
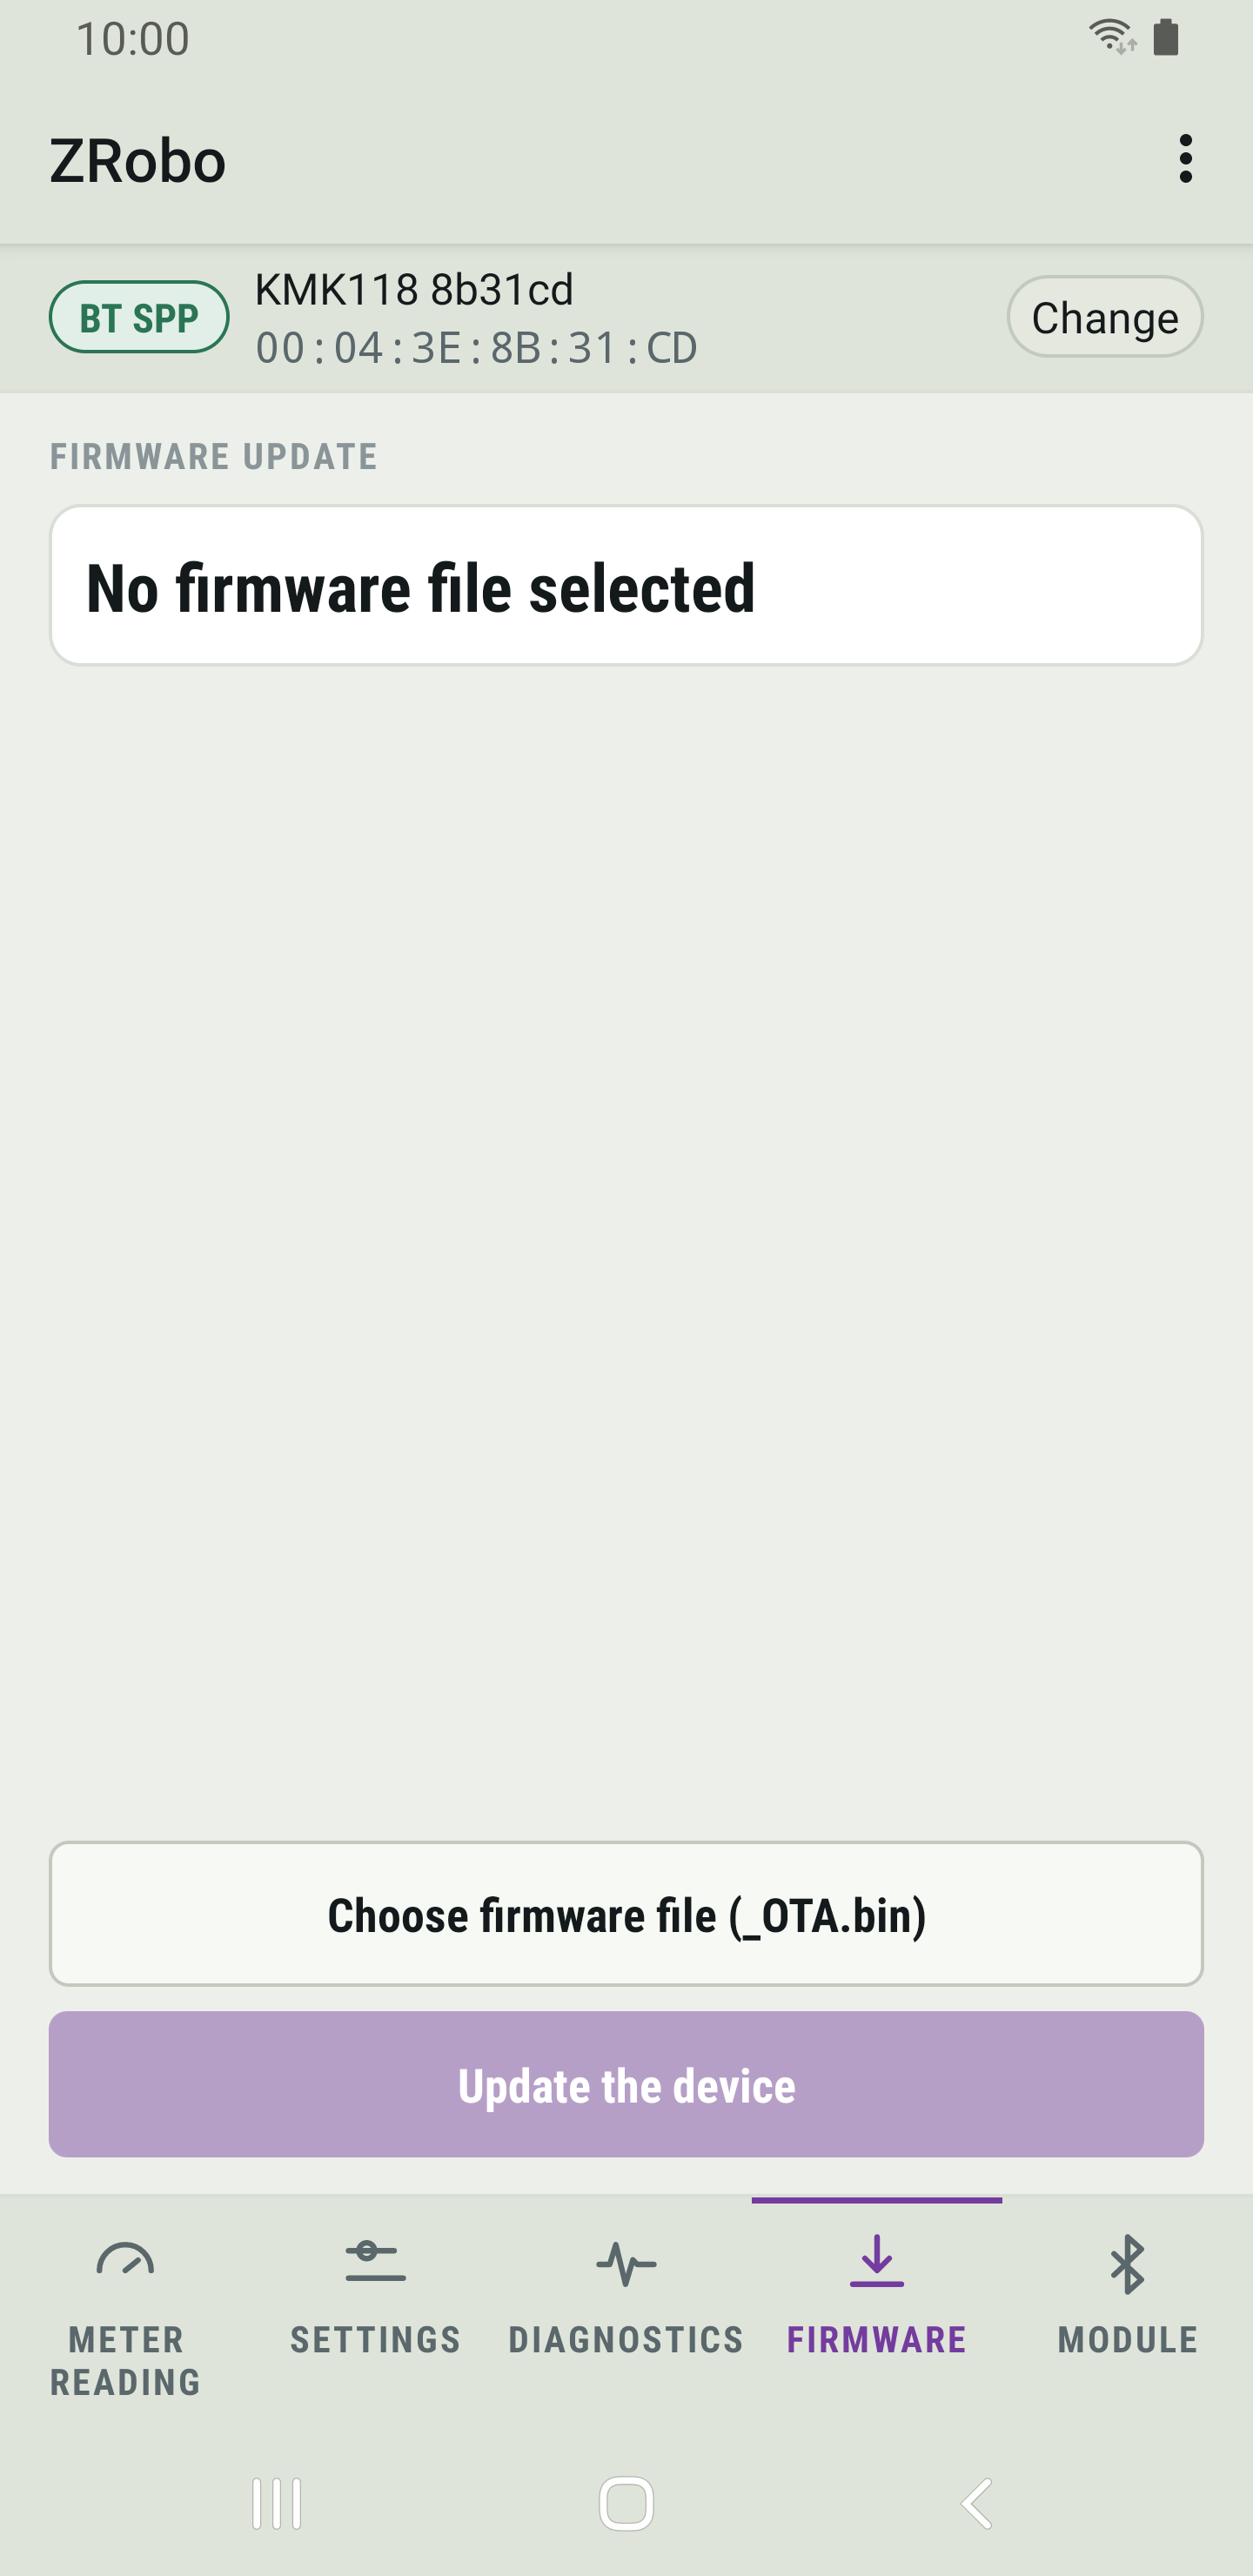
Tap Choose firmware file (_OTA.bin) and pick the file in Android's file picker. ZRobo checks the file before anything is sent and says under its name whether it can be sent, for example "This firmware file can be sent to the connected device." If not, it says why, and Update the device stays off.
- A compressed _OTA.bin file is for a probe with a current bootloader. The probe keeps its old firmware until the new one has arrived whole.
- A raw image is for a probe with an older bootloader. It is written straight in, with no copy of the old firmware: if the transfer stops half-way, the probe stays in its bootloader until it is written again.
The battery check
When you start the update, ZRobo first asks the probe for its battery voltage. If it is below 3100 mV, or the probe does not say, ZRobo asks whether to go on. Charge the probe first: the probe itself refuses to start an update on a low battery.
Updating a probe
- Choose the firmware file.
- Tap Update the device. The bar fills as the file is sent, packet by packet.
- When the file has arrived, the probe restarts with the new firmware and ZRobo reconnects by itself. It then says "Done - the device came back with the new firmware and is connected again."
This video is in the online version of this manual.
If the bar still shows Offline after an update, tap the bar to connect again.
If the connection drops during an update, nothing is committed and the probe still runs its old firmware. Reconnect: the button then offers to continue, and the update goes on from where it stopped.
A probe with an older bootloader
An older bootloader can only be reached in the first seconds after the probe is switched on. ZRobo asks "Have you switched the probe off and on?" Switch the probe off and on, then answer Yes: ZRobo looks for the bootloader and writes nothing until it answers. If the moment is missed, ZRobo says so and nothing has been written; try again.
When an update stops half-way
A probe whose raw-image update stopped half-way no longer starts up: its lights are not in their normal state and it does not answer. Choose the same file again, tick The probe is already sitting in its bootloader and tap Update the device: the file then goes straight to the bootloader. After a failed upload ZRobo may also ask "Is the probe stuck in its bootloader?" Leave the box clear for a working probe.
If the bootloader still refuses the file, the probe needs its wired service port or a programmer.
Bluetooth module
Module reads the probe's Bluetooth module through the probe. The values come from the module itself, a few at a time, so a read takes some seconds.
On a probe with older firmware the page is not shown, because that firmware cannot reach its module.
Reading the module
Tap Read from the module. Each row of Identity and our defaults then shows two values: On the module is what the module reports, and Our standard is the value REDZ sets in production. The line at the top says whether every compared row matches the standard.
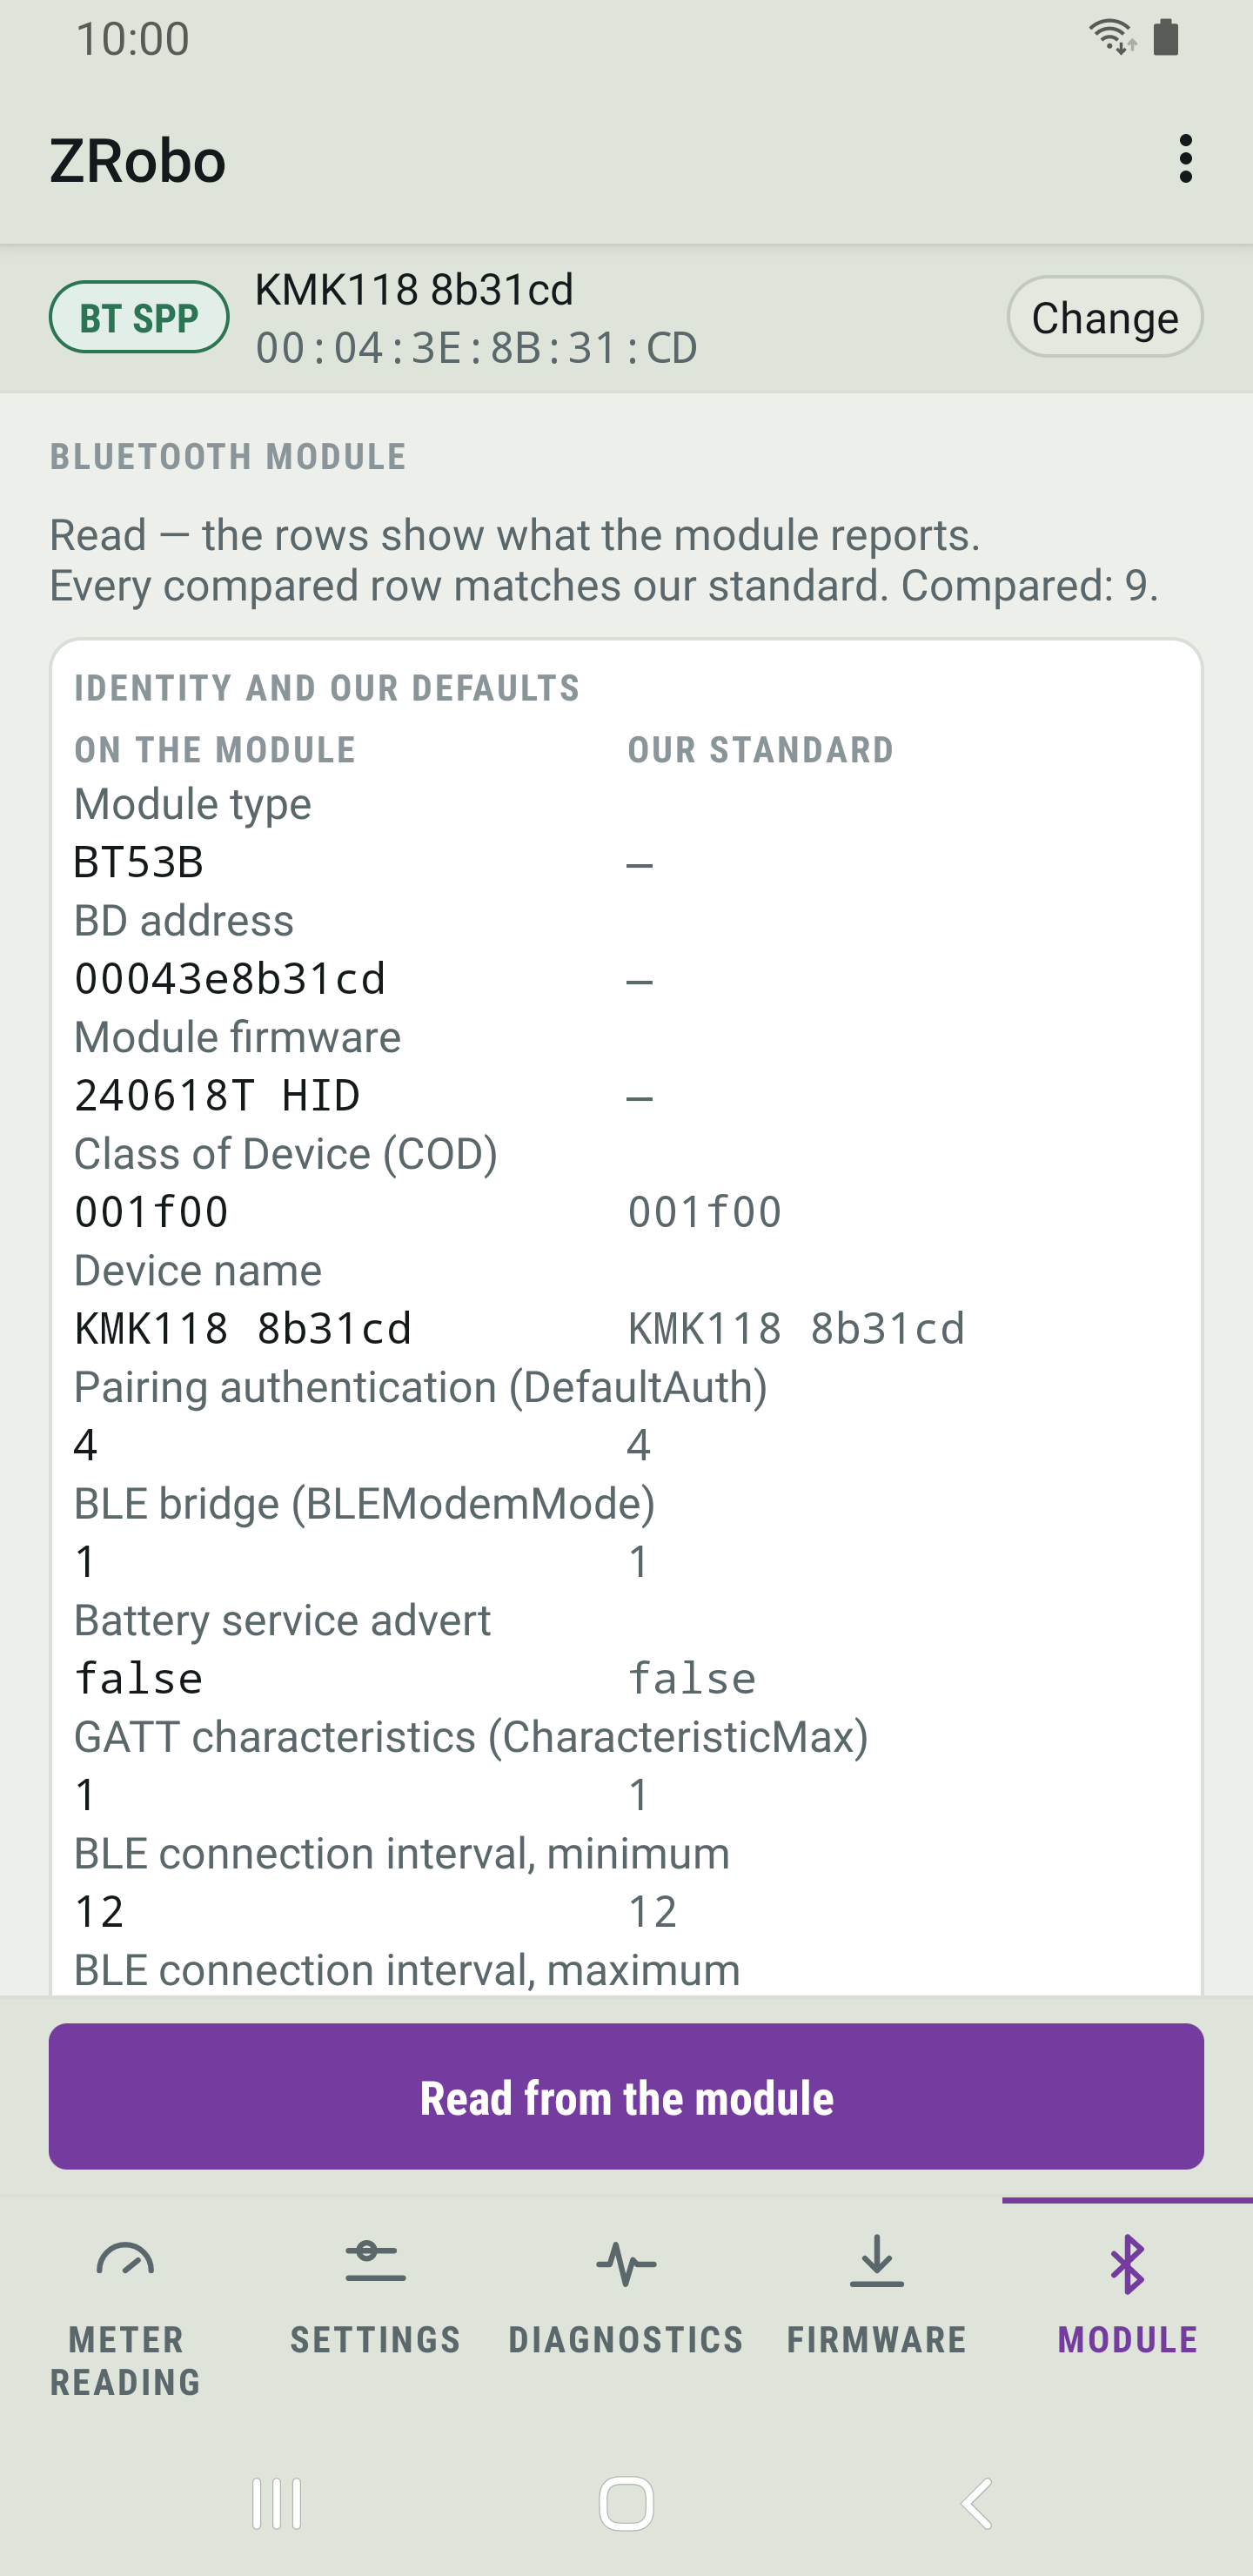
The module's type, address and firmware have no standard; they only identify the module. The standard device name is the probe's model followed by the last three bytes of its address.
Writing our defaults
Without Advanced mode this page only reads. When a row differs from the standard, turn on Advanced mode from the menu at the top right; the page then has boxes to write into.
- Tap Read from the module.
- Tap Load our defaults (fills the boxes only). ZRobo fills the boxes of the rows that differ from the standard; nothing is sent yet.
- Check the rows. A card at the top lists how many fields will be written, with a note on any field that needs one.
- Tap Write and verify (module restarts). The module restarts, so the link drops for a few seconds and comes back by itself. ZRobo then reads the fields again and says "Written, module restarted, read back and verified."
A field the module did not keep is named, with the value the module reports instead.
Restart and factory settings
In Advanced mode, two buttons at the bottom act on the module itself, each after a confirmation:
- Restart the module restarts the module. The link drops and comes back in a few seconds, and the rows are read again.
- Module factory settings tells the module to load its factory settings. Do not use it in the field: in a test the phone's pairing with the probe was lost and the probe could not be reached from the phone again until it was switched off and on.
Over BLE
Reading the module is fully supported over BT SPP. Over BT BLE, depending on the probe's firmware, ZRobo may not be able to read it and then tells you to connect over BT SPP.
Advanced mode
Advanced mode is in the menu at the top right. Turning it on asks first: "Shows service-level rows (module guard, factory paths). It is a safety catch, not security - wrong values can make a probe unreachable in the field." Turning it off does not ask.
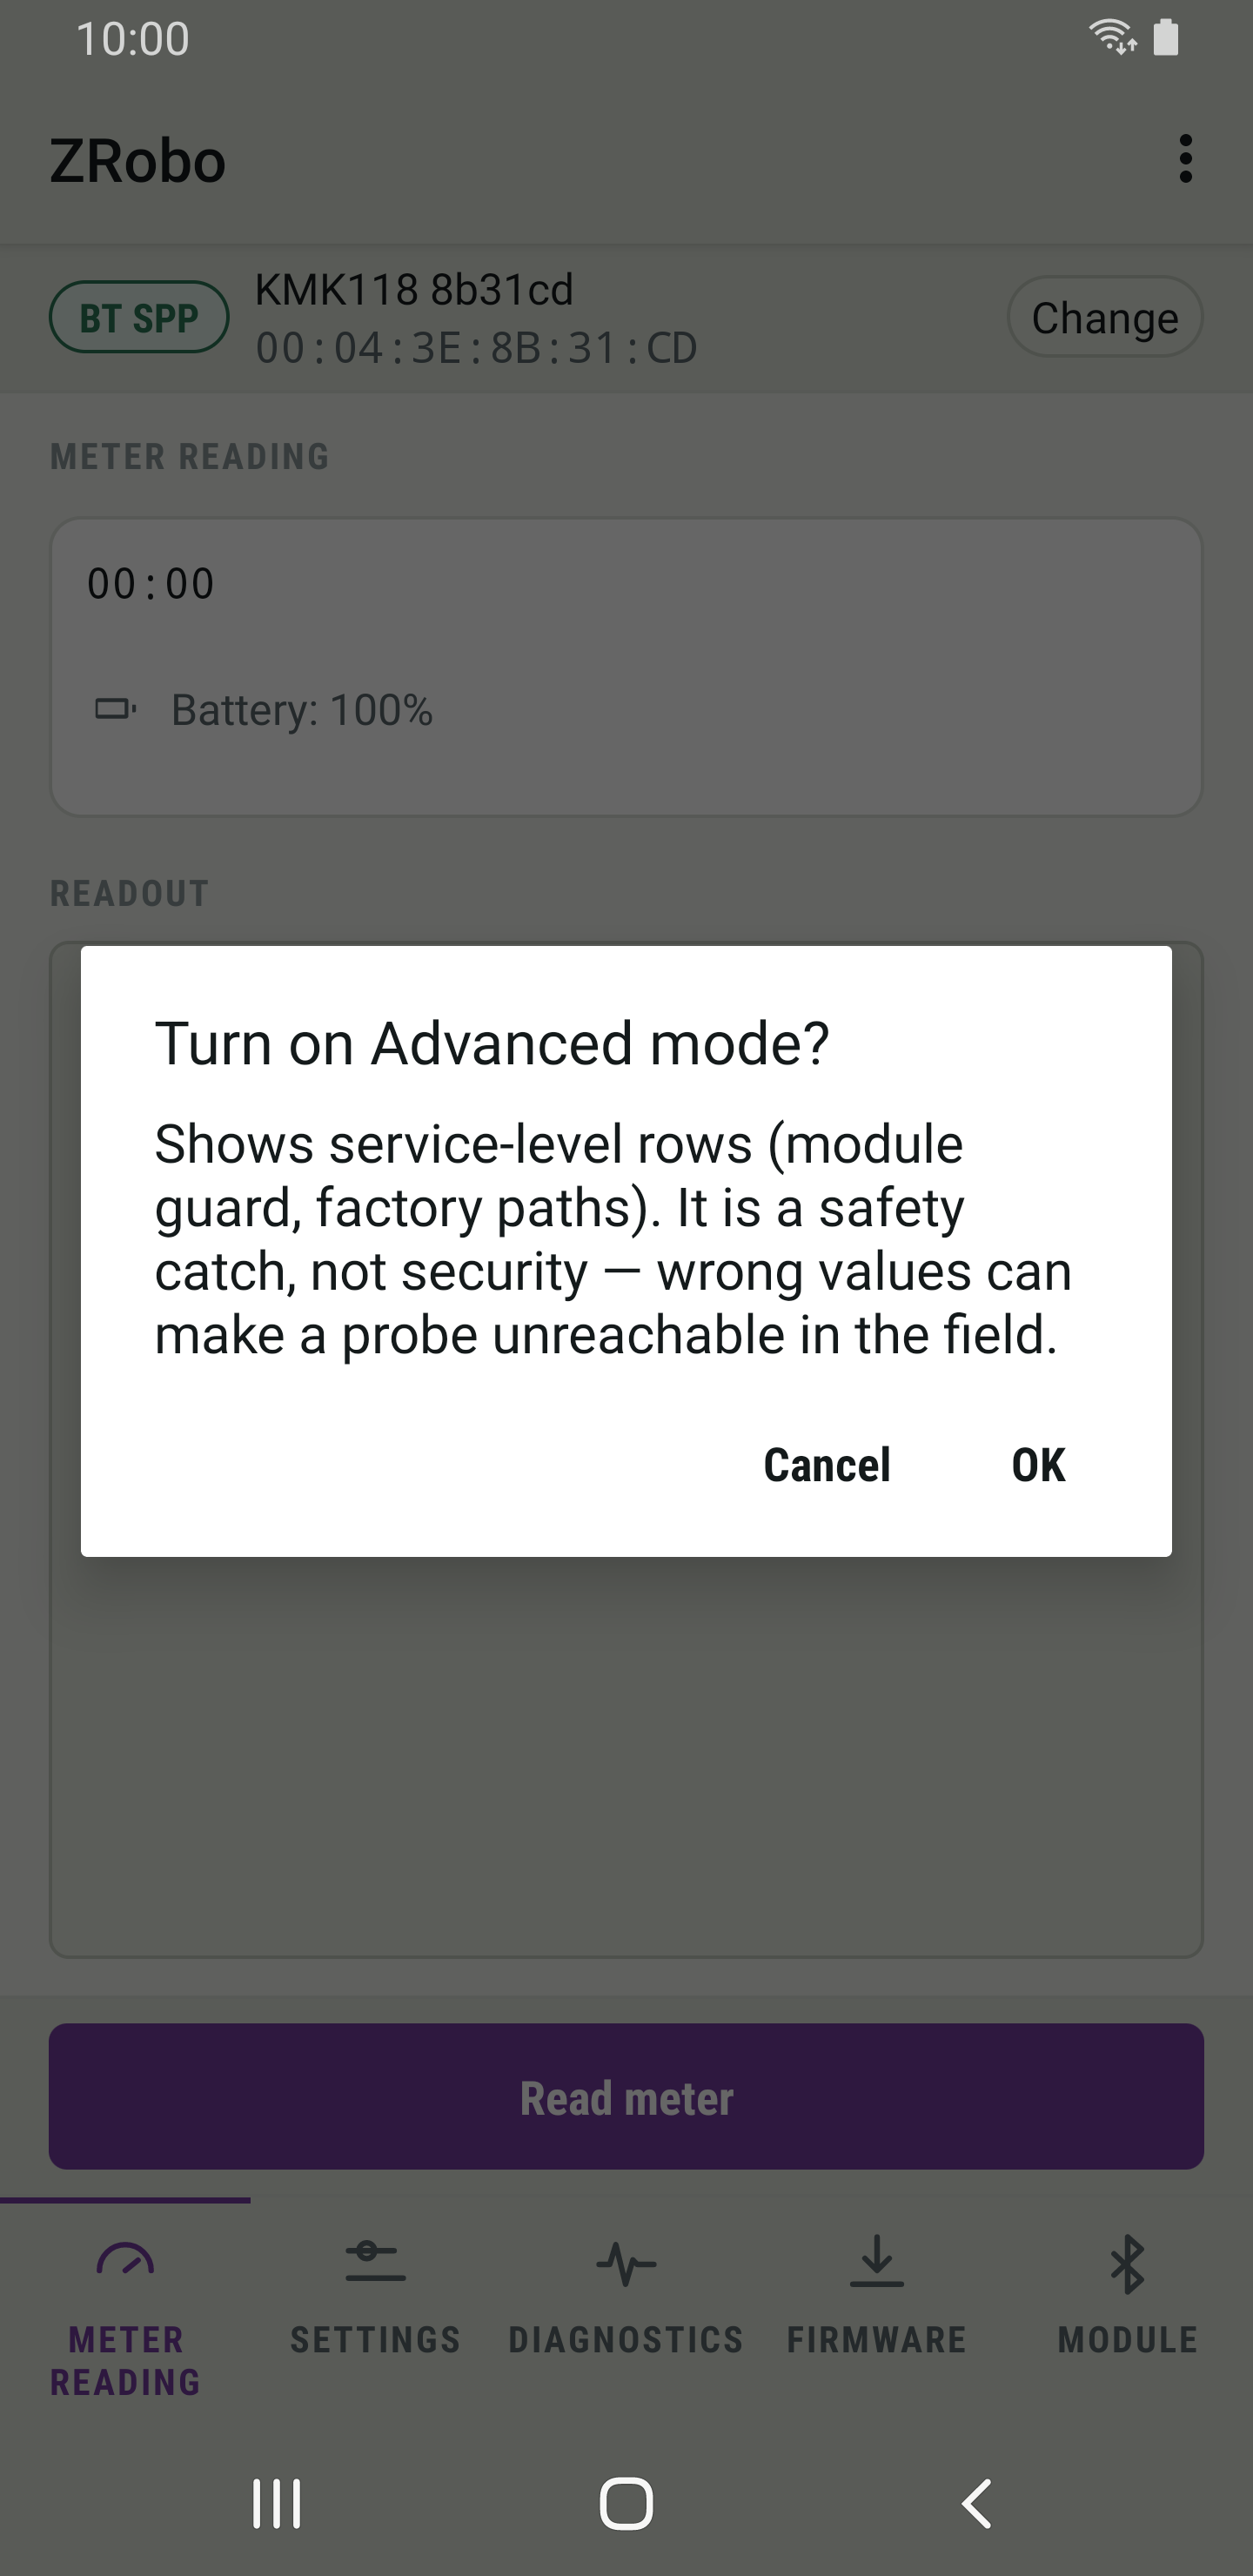
It stays on, also after ZRobo is closed, until you turn it off.
What it adds
- In Settings, on the Device tab: Device management, with the module guard setting, Device factory defaults and Turn the device off.
- In Module: the boxes to write into, Load our defaults (fills the boxes only), Restart the module and Module factory settings, and a second card with the module's other fields. Those fields are read only while the card is shown, so a read takes longer.
Advanced mode does not lock anything away from anyone: it keeps rarely needed controls out of the way so that they are not changed by mistake. Leave it off for daily work.
Tablets
On a large screen - a tablet whose shorter side is at least 600 dp and whose current width is at least 840 dp - the pages are listed in a rail on the left instead of along the bottom, and the page you work on stays a readable width beside it.
Turning the tablet moves the rail between the side and the bottom as the width changes. The connection and a job that is running carry on.
As on a phone, the rail appears only once a probe is connected.
Troubleshooting
Each entry starts with what ZRobo shows, then what to check.
No probe is listed
- "Bluetooth is off. Turn it on to see probes."
- "Bluetooth permission was not granted - devices cannot be listed without it. Tap Scan to be asked again."
- "Location services are off - Android returns an empty scan on this version. Turn location on and search again."
- The probe is on but not in the list: a scan lists only REDZ probes. If its Bluetooth name has been changed, tick Show all Bluetooth devices when scanning (default: REDZ/KMK probes only) in Settings and scan again.
The probe does not connect
- "Bluetooth device connection failed!" Check that the probe is switched on: a probe that is off cannot be reached, and some probes switch themselves off after a while.
- "Pairing failed or cancelled" Android's pairing request was not confirmed in time. Tap the probe again and confirm the request straight away.
A reading fails
- "The read finished with nothing: not a single line arrived. Check that the optical head sits on the meter's eye and that the probe is set for this meter, then read again."
- "The probe refused it: not in command mode right now" Turn off Bluetooth REDZ command mode for a probe in an automatic mode.
- The lines arrive but the label shows Failed: the reading did not arrive whole or its block check character was wrong. Read again.
The probe refuses a command
- Meter line is off, or a change is refused: the probe is not in command mode. The card says how to put this model into command mode.
- A row of the Device tab is marked "the device refused it": the probe did not take that value. Read the device again to see what it holds.
An update is refused
- "This firmware file is for another model. Choose the matching firmware file."
- "The device would not start the update: it may be busy, the meter may be talking, or the battery may be low. Try again in a moment."
- "The device rejected the update; nothing changed, it still runs the old firmware."
Moving from ZRobo 2.x
ZRobo 3 installs over ZRobo 2.x as an update. It still reads meters the same way, still saves readings as plain text files and still speaks English, Turkish and Italian. What changed is the screen: the old single screen became a set of pages.
Where each control of the old screen went
- BT Port and Serial Port: the Devices page, which opens whenever nothing is connected. While a probe is connected, tap Change in the bar at the top.
- The Bluetooth device list: the same Devices page, with a scan that lists REDZ probes.
- Read Meter and the readout: Meter reading, where ZRobo opens after connecting.
- Baud, data bits, parity and stop bits: for a wired probe, Meter reading shows Initial baud rate and Available ports. For a Bluetooth probe, the probe's own line is set in Settings, on the Device tab, under Meter line.
- Menu, Settings: the menu entry App settings, or the Functional tab of Settings.
- Menu, Show Files: the menu entry Saved reading files.
- Menu, About: the menu entry About, which now also shows the installed version.
Diagnostics, Firmware and Module are new, and so is the Device tab of Settings.
Your saved readings
- Readings saved with ZRobo 2.x are not moved or deleted; they stay in the phone's Documents folder. On Android 9 and 10, Saved reading files lists them together with the new ones. On Android 11 and newer, Android does not let ZRobo read that folder, so they are not listed; open them with a file manager.
- ZRobo 3 saves new readings in its own folder on the phone. To keep a copy elsewhere, share it from Saved reading files.
- Android removes ZRobo's own folder when the app is uninstalled, so share the readings you need before uninstalling.